How to Set Up a Shelter-in-Place Room at Home
Turn one ordinary room into a practical household base for a long disruption without blocking the exit, burying the floor in supplies, or assuming one location fits every emergency.
Short answer
Key takeaways
- Choose the room for the current task and official instructions; no ordinary room is the correct shelter for every situation.
- Reject any room whose door, route, temperature, communication, or usable floor area fails with the actual household inside.
- Subtract fixed furniture, door swing, and the clear route before counting floor area; room dimensions alone exaggerate capacity.
- Build four zones: clear route, information and power, daily supplies, and rest or personal space.
- Run a two-hour household test and maintain a written setup card so the room can be made ready without improvisation.
Set up a shelter-in-place room by choosing a room the household can reach and use, preserving its door swing and departure route, and dividing it into four working zones: route, information, daily supplies, and rest. Keep only a practical working layer in the room, stage backup light and communication together, and test the finished layout with every occupant for two hours. Use current official instructions to decide whether this room, another location, or evacuation is appropriate.
This is not a structural protection guide and does not make one ordinary room suitable for every emergency. NYC Emergency Management explains that sheltering may mean simply remaining at home or may require specific actions for a nearby hazard. The situation and the responsible local authority determine the correct location and actions.
This guide owns detailed room selection, setup, testing, and maintenance. Use the whole-home readiness audit to decide how the room fits the rest of the property, and keep leaving conditions and routes in the home evacuation plan.
Define the Room's Job Before Choosing It
The phrase “shelter-in-place room” can hide two different jobs. Separate them before moving any supplies.
The first job is official short sheltering. An authority may tell residents to remain indoors, move to a particular type of room, change ventilation, or take other situation-specific actions. Those instructions take priority. A room selected for a long outage does not override them.
The second job is long-disruption household operation. The home may still be usable while electricity, internet, water, deliveries, transport, or normal access is unreliable. Concentrating essential daily activity in one manageable room can reduce searching, unnecessary movement, power demand, and scattered information.
Write the room's normal job at the top of the setup card:
Household base room for information, daily supplies, rest, and the next stay-or-leave decision.
Then add the authority boundary:
Follow current local instructions. Move to another location or leave when the instructions, building condition, route, temperature, or indoor environment require it.
That wording prevents the room from becoming a promise it cannot keep. It also makes the setup useful during an ordinary long outage, when no special protected location has been ordered.
Shortlist Candidate Rooms Before Moving Supplies
Walk through the home with every regular occupant. Include the places people normally sleep or work, the usual nighttime route, the closest usable bathroom, and the ordinary exits. A spare bedroom may look convenient but fail for a person who cannot reach it without stairs. A central room may have good communication reception but no usable floor after furniture is counted.
Shortlist two or three rooms. Do not start by filling the smallest interior closet with supplies. A candidate needs to work as a room, not merely exist at the right point on a floor plan.
Record these facts for each candidate:
- floor dimensions and fixed furniture;
- inward or outward door swing and the route beyond it;
- ordinary lighting and the location of battery backup light;
- phone and radio reception tested in the room;
- seasonal heat, cold, and airflow under normal safe use;
- distance to a usable exit and the route needed to reach it;
- access for mobility equipment, children, pets, and support items;
- nearby plumbing, electrical, or household equipment that could make the room unsuitable when a service fails;
- time required to convert the room from its everyday use.
If loss of heat is part of the household's outage risk, also apply the warm-room selection and heat-retention plan before assigning this room a cold-weather role. A room that organizes supplies well may still fail because it is too open, difficult to separate from unused space, or unsuitable for the household's bedding layout.
If loss of powered cooling is part of the household's outage risk, apply the passive home cooling plan before assigning the room a hot-weather role. Window exposure, approved openings, shaded outdoor conditions, and the room's measured temperature trend may make a different room the better seasonal choice.
Government of Canada planning guidance asks households to identify possible exits from every room and keep the emergency plan in an easy-to-find location with the kit. Apply that constraint while comparing rooms: the shelter setup must preserve the home's departure plan rather than compete with it.
Score Each Candidate Room with Hard Gates
A weighted score can make an unsuitable room appear acceptable because several convenient features hide one serious failure. Use hard gates first. A candidate passes only when every required line works for the actual household.
Score rooms before adding new furniture or supplies.
| Gate | Pass | Needs work | Reject for now |
|---|---|---|---|
| Authority fit | The room can be used when current instructions permit it, and the setup card says when to move elsewhere | Local shelter guidance has not been recorded | The household assumes this room is correct for every event |
| Route | Door, door swing, and path to a usable exit remain clear | One movable everyday item needs a marked storage position | Fixed furniture, stored supplies, or a building feature blocks the route |
| Capacity | Everyone and required support equipment fit in a tested layout | The room works only after a defined setup step | The measured layout cannot hold the household without using the route |
| Information | At least two planned information methods can be received or checked | One method works and a second can be staged | The room depends on one internet connection or one untested device |
| Light and power | A battery light and the planned device-power chain work in place | Equipment exists but cables or batteries are not staged | Movement depends on fixed electric lighting |
| Everyday condition | The room is dry, maintained, and usable in the relevant season | A known maintenance task has an owner and due date | Temperature, air, moisture, or building condition makes occupation unsuitable |
| Household access | Every expected occupant can enter, turn, sit or rest, communicate, and leave | A specific movable item or layout change is required | A person, animal, or essential support item cannot use the room or route |
“Needs work” is not a pass. Write one corrective action, owner, and verification date. Reject any room that requires structural, electrical, gas, or ventilation modification unless a qualified local professional has completed and approved the work.
For an official short shelter instruction, local guidance may use different criteria. NYC Emergency Management recommends identifying a room with few doors or windows and says its ideal room allows at least 10 square feet per person. That figure belongs to its short shelter-in-place context; it is a screening reference, not a universal room specification.
Calculate Usable Floor Area, Not Room Area
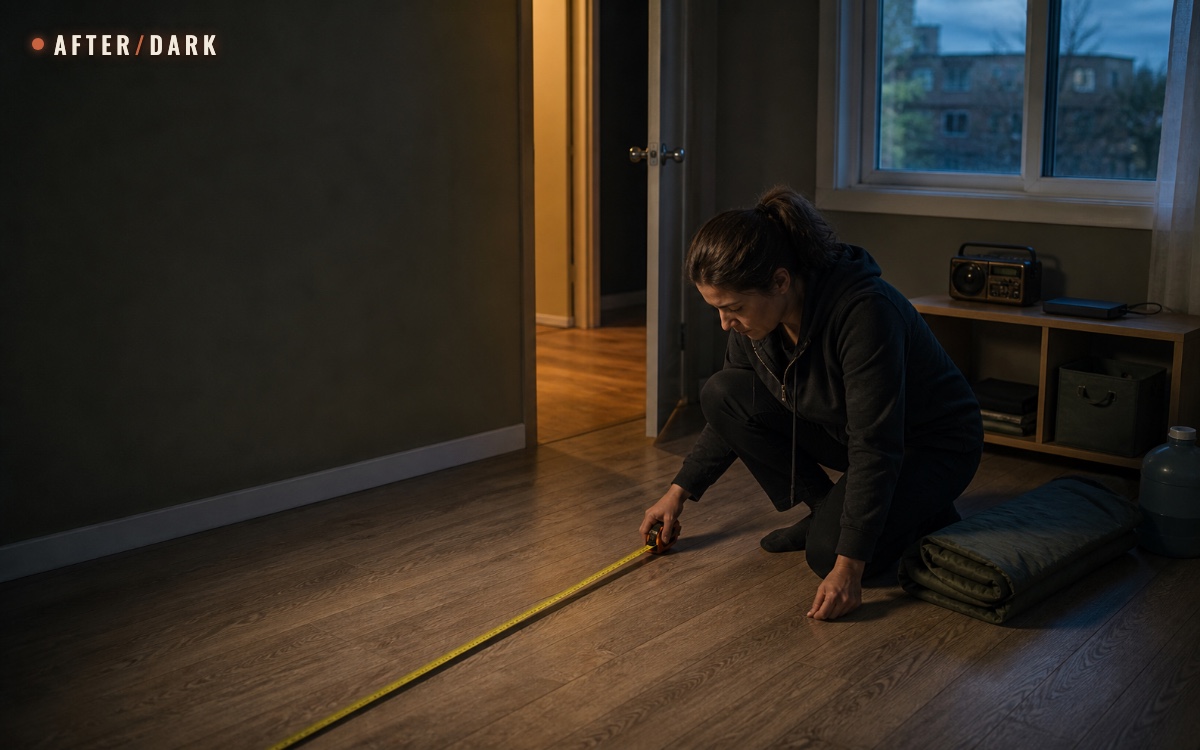
Length multiplied by width gives total floor area, but people cannot occupy the floor under a cabinet, inside a door swing, or across a route. Calculate what remains after those footprints are removed.
usable floor area = total room area − fixed furniture − door swing − clear route − staged supply footprint
Measure in one unit from start to finish. If the room has an irregular shape, divide it into rectangles, calculate each, and add them. Mark the result on a simple floor sketch.
This worked example is an editorial calculation, not an official capacity standard.
| Item | Example footprint |
|---|---|
| Room: 10 ft × 12 ft | 120 sq ft |
| Fixed cabinet and desk | −28 sq ft |
| Door swing | −8 sq ft |
| Clear route to door | −18 sq ft |
| Daily-supply module | −6 sq ft |
| Remaining usable floor area | 60 sq ft |
The arithmetic does not prove that six people fit because 60 divided by 10 equals 6. The NYC figure is tied to a particular short-duration context, and floor area alone says nothing about mobility equipment, pets, seating, bedding, heat, noise, or the route people need to reach a bathroom or leave. Use the calculation to reject obvious overcapacity, then prove the layout with the household test.
For metric planning, 10 square feet is approximately 0.93 square meters. Keep the source figure and the rounded conversion together so a future reader does not mistake the converted number for a separate recommendation.
Build Four Working Zones
Use tape markers on the floor during setup, then remove them when the layout is understood or replace them with discreet furniture-position marks. The zones can overlap in time, but not in a way that blocks the route.
Give every object a function and a home outside the clear route.
| Zone | Purpose | Typical contents | Completion test |
|---|---|---|---|
| Route zone | Entry, movement, and departure | Door swing, path, footwear position, portable room module pickup point | Everyone can enter and leave in low light without moving another object |
| Information and power zone | Alerts, household status, charging, and decisions | Radio, phones, power banks, cables, printed contacts, pencil, setup card | One person can receive an update and record the next action without unpacking the room |
| Daily-supply zone | Current-use water, food, hygiene, and household consumables | One labeled working container or low shelf | The next day can begin without opening the deeper reserve |
| Rest and personal zone | Seating, sleep, quiet activity, and individual access items | Folding mats or existing seating, blankets, personal pouch, pet resting area | Every occupant has a defined place without using the route |
Keep the route zone empty
The route zone is deliberately boring. Do not place a chair “temporarily” behind the door, charge a phone across the walkway, or move a supply box into the path because it is convenient. Route width should be determined by the people and equipment that use it, not by an arbitrary number copied from another building.
Test the full movement: enter, close the door normally, cross to each zone, turn with any mobility equipment or carrier, collect the portable module, reopen the door, and reach the next usable route. Do this with normal room lighting off and a battery light on. Do not disable alarms or household safety systems for the test.
Make information visible but private
Place the information zone where one person can work without standing in the route. Keep the room setup card, printed household contacts, current task list, pencil, radio instructions, and charging map together. Avoid displaying private records toward a window or common corridor.
Connect this zone to the household communication plan. The room does not need a second communication system; it needs the current plan, working equipment, and a place to record the latest verified update.
Store a working layer, not the entire reserve
The daily-supply zone should hold a practical opening layer. The main reserve remains in the locations defined by the emergency-supply organization system. This protects usable floor area and prevents one inaccessible room from removing every supply.
Choose the working layer from the household's actual menu and routine. Include a container from the tested emergency-water system that intended users can dispense without lifting beyond their tested ability. Label the module with contents, quantity, and the location of the deeper reserve.
Give every occupant a real place
A diagram may show that people fit while the room remains impossible to live in. Assign a seating or resting position for each person and a stable resting area for each animal. Keep personal pouches identifiable without requiring color alone; use large print, symbols, texture, or another method the household can distinguish.
If one person needs quiet, a particular seat height, a charging location, or a clear line to visual information, make that part of the floor plan rather than an optional improvement.
Create One Portable Room Module
The room may be wrong for the actual instructions, or the home may stop being usable. Keep the information and immediate-use layer portable enough to move to another room or leave with the household.
Use one tote, wheeled case, or other container the assigned person has tested. It should not contain the whole reserve. Its job is to move the room's basic function.
The portable module preserves continuity when the location changes.
| Module section | Function | Example contents |
|---|---|---|
| Information | Receive and record verified instructions | Printed contacts, setup card, radio instructions, pencil and notepad |
| Light and power | Maintain essential visibility and communication | Battery light, labeled power banks, correct cables and adapters |
| Immediate supplies | Cover the move and first operating period | Small usable water container, ready-to-eat food from the household plan, hygiene items |
| Household access | Preserve individual participation | Communication aids, assistive-device accessories, child comfort item, pet lead or carrier plan |
The American Red Cross includes water, ready-to-prepare food, a flashlight, radio, batteries, phone chargers, contact information, child items, pet supplies, and bedding among household emergency-kit considerations. Use that official list as a review source, then keep only the room's immediate layer in this module. The deeper household quantities belong in their own guides and storage locations.
Weigh and carry the finished module through the real route. If the assigned person cannot move it, split the functions across two clearly labeled modules and assign each one. Do not solve excess weight by storing it in the route.
Keep Light, Power, and Information Redundant
Fixed room lighting may disappear at the same time the household needs to set up. Stage one battery light where it can be reached from the entrance without crossing the dark room. Add a second independent light or compatible backup battery rather than relying on every person finding a phone flashlight.
CDC's emergency power checklist includes emergency lighting, extra batteries, power banks, adapters, a battery-powered or hand-crank radio, and battery or backup household alarms. Use the phone, light, and radio power plan to calculate the actual watt-hours and preserve a communication reserve; this article only assigns the equipment to a usable room location.
Label each cable by destination and test the complete chain:
source → cable → adapter → device → successful charge
Then record which item is reserved for communication and which can be used for ordinary lighting. A box of charged equipment is not redundant when every device depends on the same missing cable.
Keep all fuel-burning equipment outside the room and outside the home. CPSC states that portable generators must be used outdoors, well away from windows, doors, vents, and other openings, and recommends a working carbon monoxide alarm in the home. Opening a door or window does not turn the room into an equipment location.
Adapt the Room to the Actual Household
A generic supply list cannot decide whether the room works. Build around the people and animals who will use it, including anyone who stays regularly or may need assistance reaching the room.
Apartments and shared buildings
Do not use a shared corridor, stair landing, or building exit as overflow storage. Record the building's alert method, ordinary stair route, management contact, and rules that affect doors, windows, ventilation, or common areas. If the selected room depends on an elevator for access, it does not provide a complete outage plan.
Test sound and phone reception with the apartment door closed. Keep the room module inside the home and confirm that moving it does not narrow the shared route. The household plan should distinguish “remain in the apartment” from “move to a public shelter” or “leave the building”; those are different actions with different instructions.
Children and pets
Give children a known resting place and one quiet, familiar activity. Keep the room explanation simple: where to sit, which adult gives updates, and what the signal to move means. Do not make a child responsible for interpreting alerts or deciding whether the household stays.
Stage pet water, a resting location, waste supplies, and the carrier or lead plan without enclosing the route. Test the room with the animal under ordinary conditions before assuming it will settle there. The Red Cross supply guidance explicitly treats child and pet items as household-specific additions rather than optional afterthoughts.
Mobility, sensory, and communication access
The person who uses an assistive device should test the layout and direct changes. Confirm the entry, turn, transfer or rest position, communication method, power connection, and exit with the exact equipment used at home. Do not move a device into a remote storage location merely to make the floor plan look larger.
Government of Canada guidance recommends planning for specific household needs, accessible communication tools, labeled equipment, alternate power where needed, and practice with the person's support network. For the room, that means information should not depend on only sound, only vision, small print, or one charged device. Use the formats that the actual household can receive and understand.
Run the Two-Hour Room Test
The two-hour test is an After/Dark editorial method for finding layout failures; it is not an official shelter duration. Choose a calm time. Keep normal household safety systems active, tell every participant the test can stop at any point, and do not simulate a dangerous condition.
Before starting, place every room item in its marked position and switch off only the room's normal electric lights. Use the planned battery-light layer. Bring every regular occupant and required support item into the room.
Run these tasks in order:
- Enter and close the door normally without moving stored items.
- Turn on the first battery light from the entrance.
- Receive a test message or radio station through each planned information method.
- Find the printed contacts and write the test start time.
- Charge one essential device through the complete backup chain.
- Dispense drinking water without moving a heavy reserve into the route.
- Set up every seat, mat, pet space, and individual access item.
- Let the household remain in the working layout for two hours of quiet normal activity.
- Pack the portable module and move it through the departure route.
- Record every item moved, missing, difficult to reach, confusing, noisy, unstable, or dependent on electricity.
Use the log to decide whether the room passes, needs a change, or should be replaced.
| Test line | Pass condition | Record when it fails |
|---|---|---|
| Entry and route | Everyone enters and leaves without moving an obstacle | Object, location, and new storage position |
| Information | Two planned methods work or can be checked | Failed method and tested alternative |
| Light | Entry light is reachable and backup works | Battery, placement, cable, or glare problem |
| Capacity | All occupants have a usable position outside the route | Missing space, seat, mat, or access need |
| Daily supplies | Water and immediate items can be used cleanly and steadily | Weight, opening, label, or placement problem |
| Portability | Assigned person moves the module through the route | Actual weight or route constraint |
| Decision boundary | Everyone can state who checks instructions and what triggers a move | Missing role, source, or trigger |
The most useful result may be rejection. A room that fails after forty minutes is not rescued by a neat shelf or a higher paper score. Test the next candidate with the corrected module.
Fix the Common Setup Failures
The room becomes the main warehouse
Supplies expand until the floor and furniture disappear. Return reserve items to their assigned storage locations and keep only the labeled working layer. The room is a place to operate, not a container with a door.
The best-looking room fails the nighttime route
The route crosses stairs, clutter, a narrow turn, or an unlit area. Test from every sleeping location using the battery-light plan. If the route cannot be made usable with ordinary organization and maintenance, choose another room.
One outlet controls the plan
Every cable, radio, and light is staged, but none works when wall power fails. Separate battery light from fixed lighting, preserve a charged communication reserve, and test the source-to-device chain.
The room is treated as universally correct
The household goes to the preselected room without checking current instructions or the home condition. Put the authority boundary at the top of the setup card and assign one person plus a backup to check official information.
The route becomes temporary storage
The room passes on setup day but boxes, laundry, chairs, or charging cables return to the path. Give each recurring object a normal home and include the route in the monthly household walk-through.
The setup excludes one occupant
The floor plan works only when a mobility device, pet carrier, child seat, or communication method is omitted. Test with the full household. Convenience for most occupants is not a pass.
The room has no transition plan
The household can settle in but cannot move the module or explain when to leave. Link the setup card to the evacuation plan, keep the route open, and practise the change from room mode to departure mode.
Write a One-Page Setup Card
The room should be convertible without relying on the person who designed it. Keep one printed card in the portable module and one digital copy with the household plan.
Include:
- room name and normal purpose;
- situations in which current official instructions choose another location;
- floor sketch with four zones and the clear route;
- portable module location and assigned mover;
- information sources and the person who checks them;
- light and power startup order;
- working-layer locations and deeper-reserve references;
- each occupant's position and required access items;
- leave triggers copied from the household plan;
- last test date, failures found, and next review date.
Do not put private account details on a card that remains visible. Point to the protected emergency document kit when records are required, and keep the card focused on operating the room.
Maintain the Room Every Three Months
A multipurpose room changes as furniture, work, storage, and household needs change. Use every three months as an After/Dark starting cadence, then shorten it when the room changes frequently.
During each review:
- walk the entry and departure route;
- confirm the door and ordinary hardware operate normally;
- check that no supply has migrated into the route;
- test both information methods and the battery lights;
- recharge and inspect the power layer according to manufacturer instructions;
- reconcile the daily module with the main supply inventory;
- confirm labels, printed contacts, and the setup card remain readable;
- test the layout after any change in mobility, communication, household members, pets, furniture, or building access;
- update the floor sketch and record the new review date.
Repeat the complete two-hour test at least once a year as an editorial starting point, and immediately after moving the room or changing its core layout. A fast quarterly check confirms readiness; the longer test confirms usability.
Zombie Scenario: The Room with No Floor
Fictional scenario
In a fictional zombie outbreak, the household had always called the interior storage room its shelter. When the power failed and movement outside the apartment stopped, they opened the door and found every square foot occupied by sealed boxes. The radio worked only beside the living-room window, the largest water container could not be moved steadily, and the door could not open fully with everyone inside.
They did not spend the night rearranging a warehouse. They checked the fictional local instruction, moved the portable room module to the spare bedroom, marked a route from the door, placed the radio and power layer on one shelf, and brought in only the next day's supplies. The deeper reserve stayed organized in storage. The room was less dramatic than the box-filled shelter they had imagined, but every person had a place, information could be received, and the exit remained usable.
The practical lesson is ordinary: supplies do not create a shelter-in-place room. A tested layout, working information, usable daily items, and a clear transition to another location do.
Complete the Room Before Expanding It
Finish one usable layer before buying more equipment. Choose the room, reject hard failures, calculate the real floor area, mark the four zones, build the portable module, connect the communication and power plans, and run the two-hour test. Record every correction on the setup card.
The finished room should feel like an ordinary part of the home that can change roles quickly. It should not depend on permanent clutter, a single device, one person's memory, or the belief that staying is always the correct decision. Its purpose is to help the household see, communicate, rest, use the next layer of supplies, and make the next decision with less improvisation.
Frequently Asked
Is a shelter-in-place room the same as a structurally protected room?
Does a shelter-in-place room always need to be windowless?
How much floor space should the room have per person?
Should every emergency supply be stored in the room?
Can a normal bedroom or living room serve this purpose?
Sources
- NYC Emergency Management — Get Prepared
- American Red Cross — Survival Kit Supplies
- Government of Canada — Make an Emergency Plan Form
- CDC — Power Sources
- Government of Canada — Emergency Preparedness for Persons with Disabilities
- U.S. Consumer Product Safety Commission — Generators and Engine-Driven Tools
Related guides
How to Prepare Your Home for an Apocalypse
Turn an ordinary house or apartment into a safe, workable base without blocking exits, scattering supplies, or mistaking barricades for preparedness.
How to Organize and Store Emergency Supplies at Home
Turn scattered emergency supplies into a mapped, labeled home system that stays accessible, countable, and separate from your departure kit.
How to Keep Phones, Lights, and Radios Powered During a Long Outage
Build a small-device power system around measured demand, compatible charging chains, distributed lighting, and a written no-outlet test.