How to Organize and Store Emergency Supplies at Home
Turn scattered emergency supplies into a mapped, labeled home system that stays accessible, countable, and separate from your departure kit.
Short answer
Key takeaways
- Give every supply one recorded home and one of four access levels: Immediate Access, Daily Outage, Reserve, or Departure.
- Use one label format—FUNCTION / CONTENTS / QUANTITY / NEXT CHECK—so anyone in the household can identify a container.
- Keep heavy supplies low, preserve door swings and exit routes, and let package or manufacturer requirements decide the storage environment.
- Count the home reserve and departure kit separately; a single item cannot satisfy both inventories at once.
- Run a five-minute low-light retrieval test and correct every search, obstruction, unclear label, or outdated record it exposes.
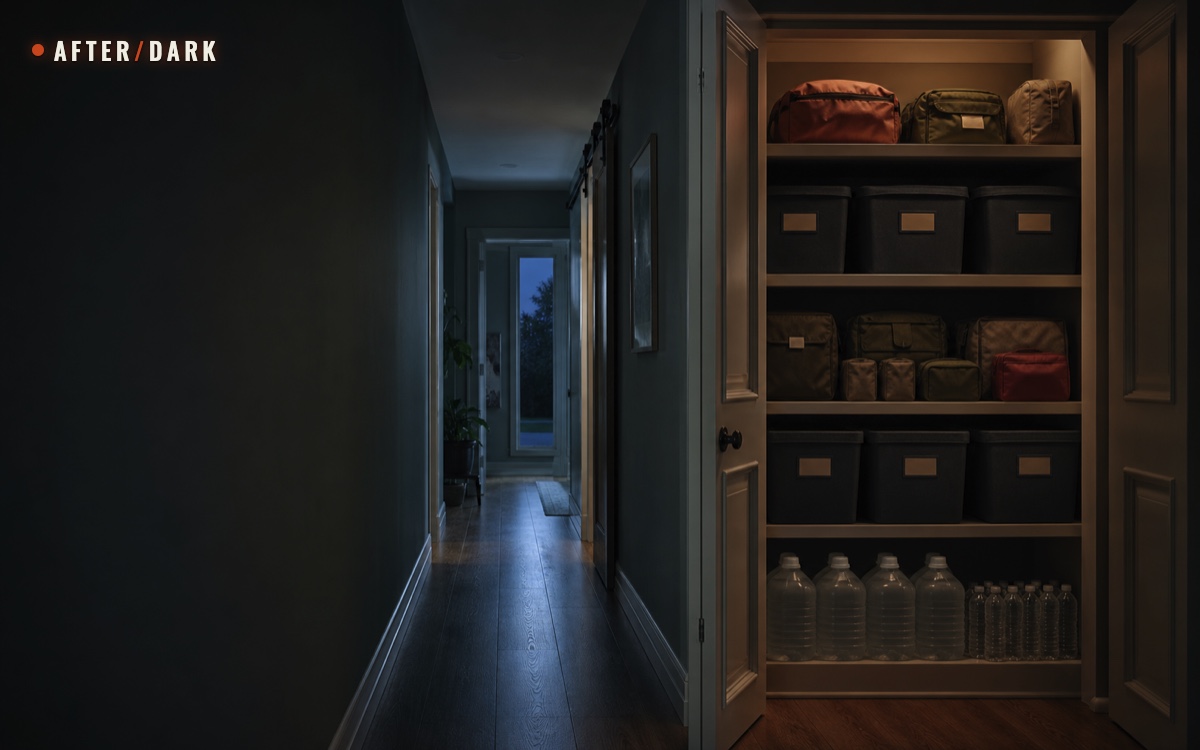
To organize emergency supplies at home, give every item a named function, an access level, a physical location, and a next check date. Keep a one-page map that lets another household member find the supplies without relying on your memory. The goal is not a photogenic wall of matching containers. It is a system that can be counted in daylight, reached safely in low light, and used without blocking the home.
This guide owns placement, access, labels, records, and retrieval tests. Use the 30-day food and water guide for quantities, the small-device power guide for charging capacity, and the bug-out bag guide for the portable departure load.
Inventory Supplies Before Buying Containers
Start with a collection walk. Open the cupboards, closets, shelves, utility areas, vehicle storage, and bags where emergency items have accumulated. Record an item where it is found before moving it. This exposes duplicates, forgotten packages, missing parts, and supplies that only appear to be available because two plans count the same object.
Do not begin by buying bins. A container chosen before the inventory often hides the real problem: the household does not know which function the contents support, how quickly they must be reached, or whether that location suits them.
Use broad functional categories rather than a shopping list:
- water and food;
- light, information, and small-device power;
- sanitation, hygiene, and cleaning;
- warmth, clothing, and bedding;
- documents, keys, and payment;
- medications as a generic inventory category only;
- supplies for children, animals, or other household-specific needs;
- departure supplies;
- ordinary tools tied to a known household task.
For medications, the organization record should contain only the category, storage location, quantity check, and next review date. Keep every item in its original labeled packaging and follow its existing storage instructions. This article does not name products, explain purposes, recommend selection or use, or provide medical guidance.
If the inventory includes wash basins, a drying line or rack, clips, and a measuring container, store them as one mapped module and use the tested manual laundry system to define the load, water record, and drying capacity they support.
First-pass inventory: record the problem before choosing a new location.
| Field | What to record | Why it matters |
|---|---|---|
| Function | The household task the item supports | Prevents unrelated objects from becoming one vague “emergency” pile |
| Item or category | A name every household member recognizes | Makes maps and labels consistent |
| Quantity | Count, volume, or number of complete sets | Exposes shortages and accidental double counting |
| Current location | Room, cabinet, shelf, and container | Shows whether the item is genuinely findable |
| Access need | Immediate, same-day, reserve, or departure | Determines placement before container size |
| Storage constraint | Package, manufacturer, temperature, moisture, light, or security requirement | Rules out unsuitable locations |
| Next check | The earliest applicable date | Turns maintenance into a scheduled task |
| Problem found | Missing part, damage, unclear label, poor access, or duplicate record | Creates the correction list |
Complete the inventory with the people who may need the supplies. If only one person recognizes a nickname such as “the blackout box,” the label is not yet household-readable.
Divide the System Into Four Access Levels
Access speed should determine placement. The four levels below describe when supplies are needed, not how valuable they are. A low-cost flashlight may need immediate access; a large reserve of expensive equipment may not.
Four access levels: each item receives one primary assignment.
| Access level | Retrieval target | Typical function | Placement rule |
|---|---|---|---|
| Immediate Access | Seconds to a few minutes | First light, current instructions, keys, and the location map | Reachable without moving another container or crossing a dark obstacle |
| Daily Outage | During the current day | Food for current use, hygiene, routine lighting, charging, and household operations | Near the living core, arranged so one day can be issued without opening the deep reserve |
| Reserve | Replenishment over later days | Additional water, food, batteries, consumables, and seasonal supplies | Consolidated, countable, protected by the correct storage environment, and clear of routes |
| Departure | At a written Leave trigger | Route card, portable documents, and the tested bug-out bag | Beside a usable exit without narrowing the door, stair, hall, or common area |
One room may contain several levels, and one level may use several rooms. The rule is that each item has one primary record. A flashlight staged near a sleeping area is Immediate Access; boxed replacements in the supply closet are Reserve. Listing both simply as “flashlights” hides the difference.
The four access levels fit inside the broader zones in the home-preparedness plan. The home guide decides where the information point, living core, supply zone, and exit zone operate. This guide decides exactly which container and shelf holds each supply within that structure.
Create a One-Page Home Supply Map
The map is the index for the physical system. It does not need architectural precision. Use a simple floor outline or room list and assign a short location code to every storage point.
A practical code combines room, fixture, and position:
HALL-CLOSET-L1— hallway closet, lowest shelf;LIVING-CABINET-2— living-room cabinet, second compartment;BEDROOM-DRAWER-TOP— bedroom drawer, top section;EXIT-HOOK-1— first assigned hook or cubby beside the departure door.
Write the code on the container and in the inventory. Avoid codes that depend on a person's name, a temporary piece of furniture, or a color alone. “Jane's shelf” stops working when the household changes; “blue bin” fails in poor light or when the bin is replaced.
One-page map register: keep the location specific and the contents broad.
| Location code | Access level | Function | Container | Route note |
|---|---|---|---|---|
| HALL-CLOSET-L1 | Reserve | Water | Four manageable containers | Lowest shelf; no container extends into hall |
| HALL-CLOSET-2 | Reserve | Sanitation | Lidded bin | Lift path remains clear |
| LIVING-CABINET-1 | Daily Outage | Light and power | Two labeled pouches | Reachable from living core |
| BEDROOM-DRAWER-TOP | Immediate Access | Light and map copy | Shallow tray | Reachable without crossing room |
| EXIT-CUBBY-1 | Departure | Route and portable kit | Closed bag and document pouch | Door swing fully clear |
Keep one printed copy at the information point and a protected copy with the household records. A photo on one phone is a useful duplicate, not the only map.
Do not put a detailed public-facing label on a window, exterior door, shared corridor, or container visible to visitors. The map can identify private or portable documents by category and protected location without listing account numbers or other sensitive details.
Choose Storage by the Contents, Not the Empty Space
An unused attic, garage corner, under-sink cabinet, or outdoor shed is not automatically storage. Evaluate temperature, moisture, direct light, pests, dust, security, accessibility, and the exact instructions on each package or device. When the location conflicts with the contents, change the location—not the instruction.
USDA advises keeping canned and other shelf-stable foods in a cool, dry place and away from temperature extremes. It also notes that different shelf-stable products have different storage windows. The package remains the authority for the product you own; a single handwritten “good for years” label is not reliable.
CDC safe-water guidance says to keep stored water cool, out of direct sunlight, and away from toxic substances. It also recommends identifying drinking-water containers and including the relevant date. Use the more detailed water quantities and rotation method in the food and water stockpile guide.
Location screen: the strictest applicable requirement decides where the category belongs.
| Category | Check before placement | Usually unsuitable when |
|---|---|---|
| Stored water | Container instructions, temperature, sunlight, nearby substances, stability, and ability to pour | The area overheats, freezes, receives direct sun, contains toxic substances, or makes the container unsafe to handle |
| Shelf-stable food | Package label, cool and dry conditions, pest protection, and opened-package plan | The area is damp, experiences temperature extremes, sits beside chemicals, or hides package condition |
| Batteries and powered equipment | Manufacturer storage instructions, charge-check access, terminals, cables, and physical condition | The location is hot, wet, exposed to damage, or separates a device from its tested cable |
| Documents and keys | Privacy, moisture protection, portability, and access by the right household members | The location is visible to visitors, known by only one person, or trapped behind the reserve |
| Medications | Existing labeled packaging, current storage instructions, privacy, and review date | The proposed location conflicts with the existing instructions or makes the category inaccessible to the responsible household member |
| Cleaning and sanitation supplies | Original labels, separation from food and water, ventilation requirements, and stable containment | The location invites leaks into food or water or requires transferring contents to an unmarked container |
| Clothing and bedding | Dryness, seasonal access, fit, and protection from pests | The materials can become damp, compressed beyond their product guidance, or unreachable when the season changes |
Do not combine products merely because they share an access level. A Reserve shelf may still need separate containers for food, sanitation, batteries, and documents because their leakage, privacy, or environmental constraints differ.
Put Heavy Supplies Low and Preserve Every Route
Water and dense food create significant weight. Place manageable containers low on stable shelving and follow the shelf or cabinet manufacturer's load limits. Do not calculate a homemade structural limit from a generic article. If the floor, shelf, anchoring, or building condition is uncertain, use a qualified local professional or building manager.
Storage never earns space inside a required route. U.S. Fire Administration guidance says doors and windows used for escape must remain unblocked and that households should plan two ways out of every room. Apply that constraint before adding shelves, bins, cords, hooks, or departure supplies.
Use a route check for every storage point:
- Open the nearby door through its complete normal swing.
- Walk the route without turning sideways around a bin.
- Check stairs, landings, windows used for escape, and shared corridors.
- Remove any container that can slide, tip, or fall into the route.
- Confirm that retrieving a heavy item does not require lifting it over shoulder height.
- Repeat the check in ordinary low light with safe lighting immediately available.
In an apartment, supplies do not belong in a hallway, stairwell, shared utility room, or space outside the unit unless the building explicitly provides approved storage there. A private inconvenience must not become a building-wide obstruction.
Use One Label Format on Every Container
A useful label answers four questions before the lid is opened:
FUNCTION / CONTENTS / QUANTITY / NEXT CHECK
Add the location code when containers are movable:
LIGHT & POWER / RADIO CABLES + POWER BANKS / 2 SETS / CHECK 2026-10-29 / LIVING-CABINET-1
Keep the category and function larger than the details. Use high-contrast print or block handwriting that remains readable at arm's length. Do not use color as the only signal; pair any color band with words or a simple symbol. Place the label on the side visible in normal storage, not only on the lid.
CDC's emergency-supply-kit guidance recommends an easy-to-carry container and a permanent marker for labeling it. Apply the same plain identification principle to home bins, while keeping individual package labels visible and intact.
Use a second, internal contents card when the external label would reveal private information or when a bin contains many small objects. The outer label can say DOCUMENTS / PORTABLE RECORDS / 1 POUCH / CHECK 2026-10-29; the protected card carries the detail.
Do not write a future date over an existing package date, remove original labels, or imply that a household review extends a product's usable period. NEXT CHECK means inspect the system by that date. It is not an expiration date.
Keep a Quantity and Rotation Log
The label helps at the shelf. The log shows whether the whole household system is complete. A spreadsheet, notebook, or printed table can work if it is current and another household member knows where it is.
Record:
- item or category;
- function and access level;
- exact location code;
- quantity on hand and target quantity from the owning plan;
- earliest package or manufacturer date that needs attention;
- next household check date;
- assigned owner and backup;
- status: ready, replace, relocate, repair, or verify.
Quantity log: separate the physical count from the target supplied by another guide.
| Category | Access level | Location | On hand | Target source | Next action |
|---|---|---|---|---|---|
| Drinking water | Reserve | HALL-CLOSET-L1 | Record measured total | Food and water plan | Check containers and dates |
| No-cook food layer | Daily Outage | KITCHEN-CABINET-2 | Record complete meals | Food and water plan | Rotate oldest suitable packages |
| Small-device power | Daily Outage | LIVING-CABINET-1 | Record tested sets | Power plan | Run charge check |
| Bug-out bag | Departure | EXIT-CUBBY-1 | 1 assigned bag | Route card and bag plan | Confirm route and contents |
The target belongs to the guide that owns the decision. This storage article should not silently change water quantities, meal counts, power capacity, or departure contents.
After any use, reduce the on-hand count immediately. A note such as “replace two tomorrow” is better than a shelf that still looks full in memory. Restore the item, update the count, and remove the note only when the physical stock and log agree.
Separate the Home Reserve From the Departure Kit
A home reserve solves staying. A bug-out bag solves a defined trip. They may contain similar functions, but one physical item cannot be available in two places at the same time.
FEMA's emergency supply list recommends a full kit at home and smaller portable kits in places where people spend time. Apply that separation visibly:
- give every departure item the Departure access level;
- keep the tested bag closed and complete at its exit-zone location;
- do not borrow from it for routine home use without recording and restoring the item;
- do not include the bag's water, food, light, or charging equipment in the home-reserve count;
- keep vehicle or workplace kits as separate inventory locations;
- use the bug-out bag route test to decide what earns space in the portable load.
If budget or space requires one object to change roles, write the transfer step into the plan and acknowledge that the second role is unavailable until the transfer happens. The cleaner system is independent enough that departure does not require dismantling the home reserve.
Rotate Dated Supplies First In, First Out
First in, first out means older suitable stock moves toward normal use before newer stock. It is a physical shelf rule and a record rule.
- Keep the original package date visible.
- Record the earliest relevant date for the container in the log.
- Place new stock behind or beneath the current-use row without hiding labels.
- Move the next suitable item into normal household use before its applicable date.
- Replace the used quantity and update the log in the same session.
- Inspect packaging and product condition during every rotation; a future printed date does not make damaged stock acceptable.
Avoid a “deep reserve” that is never opened. If a shelf requires unloading six containers to reach the oldest package, the layout works against rotation. Use shallow rows, shelf risers that remain stable, pull-out bins rated for the load, or smaller category groups.
The 30-day stockpile method owns food and water calculations. This article's contribution is making those dates and quantities visible without unpacking the entire reserve.
Adapt the System to the Home
The four access levels remain the same, but the best physical layout changes with storage volume, building rules, climate, and household access needs.
Home-type adaptations: preserve the function when the room is unavailable.
| Home type | Main constraint | Practical adaptation |
|---|---|---|
| Small apartment | Few closets and strict common-area boundaries | Use shallow interior cabinets, under-bed containers that do not block egress, and vertical storage only within rated furniture; keep nothing in shared routes |
| Larger apartment or high-rise | Stairs, building systems, and distributed rooms | Put Immediate Access supplies near sleeping and living areas, keep the Departure layer compact, and include stair-route access in the retrieval test |
| Small house | One utility area may become the default for everything | Separate categories inside the room, keep water low, and duplicate only the immediate functions that another blocked room would remove |
| House with garage or shed | More volume but wider temperature and moisture variation | Reserve those spaces for contents whose actual instructions and local conditions allow them; keep the map current across buildings |
| Shared household | Several adults may move or consume supplies | Assign location codes, owners, and a visible change log; prohibit unrecorded “temporary” moves |
| Household with children, animals, or access needs | Reach, privacy, fit, and responsibility differ by person | Place supplies for safe authorized access, name a primary and backup owner, and test with the people who will actually retrieve them |
Do not solve limited space by storing heavy items high, filling the gap behind a door, or hiding supplies so completely that the map is the only evidence they exist. Reduce duplicates without a function, move long-term quantities to an appropriate approved location, or revise the broader preparedness target honestly.
Run a Safe Five-Minute Retrieval Test
The test asks whether the system works when memory, visibility, and time are limited. It is not a simulation of danger. Keep ordinary lighting available, do not disable breakers or alarms, do not block a route, and do not ask anyone to lift a heavy container in darkness.
Prepare five task cards that name functions rather than specific products:
- Find the first independent light and the printed supply map.
- Find today's no-cook food layer and its manual opening method if needed.
- Find the household's radio charging or battery set without opening the reserve.
- Find one sanitation refill and state where the remaining reserve is recorded.
- Find the closed bug-out bag and confirm that the exit still opens fully.
Give the map to a household member who did not design the labels. Start a five-minute timer in ordinary low light. The tester may use the staged Immediate Access light; that is part of the system. Observe without giving location hints.
Record every failure:
- the map could not be found;
- a code did not match the room;
- the label faced the wall;
- two containers shared the same name;
- another bin had to be lifted first;
- a route narrowed during retrieval;
- the quantity in the log did not match the shelf;
- the departure bag had been borrowed from;
- only the system's organizer understood the shorthand.
Correct the physical system, map, label, or record, then repeat only the failed task. Five minutes is an After/Dark usability target, not an official emergency standard. The goal is a short, repeatable test that exposes searches and obstacles without creating risk.
Fix the Common Storage Failures
Failure review: each problem should produce one observable correction.
| Failure | Why it persists | Correction |
|---|---|---|
| Everything is in one large bin | Consolidation looks organized but destroys access order | Divide by function and access level; keep Daily Outage supplies independent from Reserve |
| Supplies are spread across the home without a map | Each placement seems sensible until another person must search | Add location codes and print the one-page register |
| Matching containers have vague labels | A clean appearance hides quantities and dates | Use the standard four-field label on the visible side |
| The garage or attic is treated as free space | Volume is chosen before environmental suitability | Screen the location against every package and manufacturer requirement |
| New stock is placed in front | The oldest package becomes harder to see and use | Build a physical first-in, first-out path |
| The departure bag supplies daily household needs | Two inventories count one object | Restore the bag and create a separate Daily Outage layer |
| Heavy reserve is stored high | Retrieval becomes unstable and discourages audits | Move manageable containers to low, rated storage |
| The inventory lives on one phone | A dead device or absent owner removes the system index | Keep a current printed copy and a protected duplicate |
| The organizer passes every test | The system measures memory instead of clarity | Give the map to another household member and observe silently |
Do not respond to a failed test by adding more equipment. First correct the name, location, access level, container, map, or ownership. Buy something only when the inventory identifies a specific missing function.
Maintain the System Every Three Months
Use a three-month audit as a practical household cadence. It is not a claim that every product shares the same interval; any earlier package, manufacturer, building, or local requirement takes priority.
Every three months
- compare the physical count with the log;
- inspect containers, shelves, labels, and visible package condition;
- rotate dated supplies according to their applicable instructions;
- charge and test powered equipment according to its manufacturer;
- confirm that maps, keys, contacts, and location codes remain current;
- verify that no door, stair, window, or shared route has narrowed;
- run the five-minute test with a different household member when possible;
- write the next check date on the labels and master log.
After any use or change
Review immediately after a power outage, household move, leak, pest problem, major seasonal change, change in household members, use of the departure kit, furniture rearrangement, or relocation of any storage point. Update the map at the moment of the move—not at the next quarterly audit.
Version the printed map with a date in the corner. Remove outdated copies when the new one is distributed so two maps cannot send people to different shelves.
Zombie Scenario: The Box Nobody Labeled
Fictional scenario
During a fictional outbreak, the power has been out since sunset. The household needs the next radio battery set before the scheduled information check. Three identical dark bins sit in the utility closet, but only one carries the standard label:
LIGHT & POWER / RADIO BATTERIES + CABLES / 2 SETS / CHECK 2026-10-29. The map points toHALL-CLOSET-2, and the bin slides out without moving the water below it or narrowing the hall.A fourth box has no label. Nobody opens it during the search. It is marked
VERIFYin the change log and reviewed in daylight. The departure bag remains closed beside the exit, so solving a home-power task does not quietly remove capacity from the Leave plan.
The fictional pressure exposes an ordinary standard: storage is finished only when another person can identify, retrieve, use, and restore the right category without guessing. A labeled box, a mapped shelf, and a tested route are small decisions that keep the whole home plan usable.
Frequently Asked
Should all emergency supplies be stored in one place?
Are clear storage bins better than opaque bins?
Can emergency supplies be stored in a garage or shed?
How often should the storage system be checked?
Sources
Related guides

How to Prepare Your Home for an Apocalypse
Turn an ordinary house or apartment into a safe, workable base without blocking exits, scattering supplies, or mistaking barricades for preparedness.
How to Build a 30-Day Food and Water Supply for an Apocalypse
A practical 30-day pantry for apocalypse preparedness, built from person-days, package labels, a no-cook layer, and stored water you can rotate.

How to Build an Apocalypse Bug-Out Bag
Build a portable evacuation kit around a real destination, route, household, and loaded walk test—not a generic pile of emergency gear.