How to Store Emergency Food at Home
Keep the food you already own usable: choose a storage spot, protect each type of food, retain its instructions and rotate it through ordinary meals.
Short answer
Key takeaways
- Start with the food and cupboard you already have; specialist packaging is optional for a reserve you regularly use.
- Choose packaging by the food: factory-sealed cans, protected dry staples and tightly closed oils have different storage needs.
- Keep the original label, storage directions and lot code when transferring food; add the opening date.
- Use package deadlines and opening instructions to decide what goes first, then replace it through normal shopping.
- Without reliable refrigeration, choose meal-sized portions before opening cans, cartons or other perishable foods.
Good emergency food storage keeps ordinary groceries dry, protected, identifiable and moving through meals. A reserve becomes useful when you can take a package off the shelf, understand how to use it, and replace it without discovering a forgotten layer behind it.
This guide starts after the shopping is done. It covers where food belongs, what needs a better container, what changes after opening and how to maintain the reserve through a long disruption. For quantities and meal planning, start with the 30-day food and water stockpile.
Start with one shelf and the food you already have
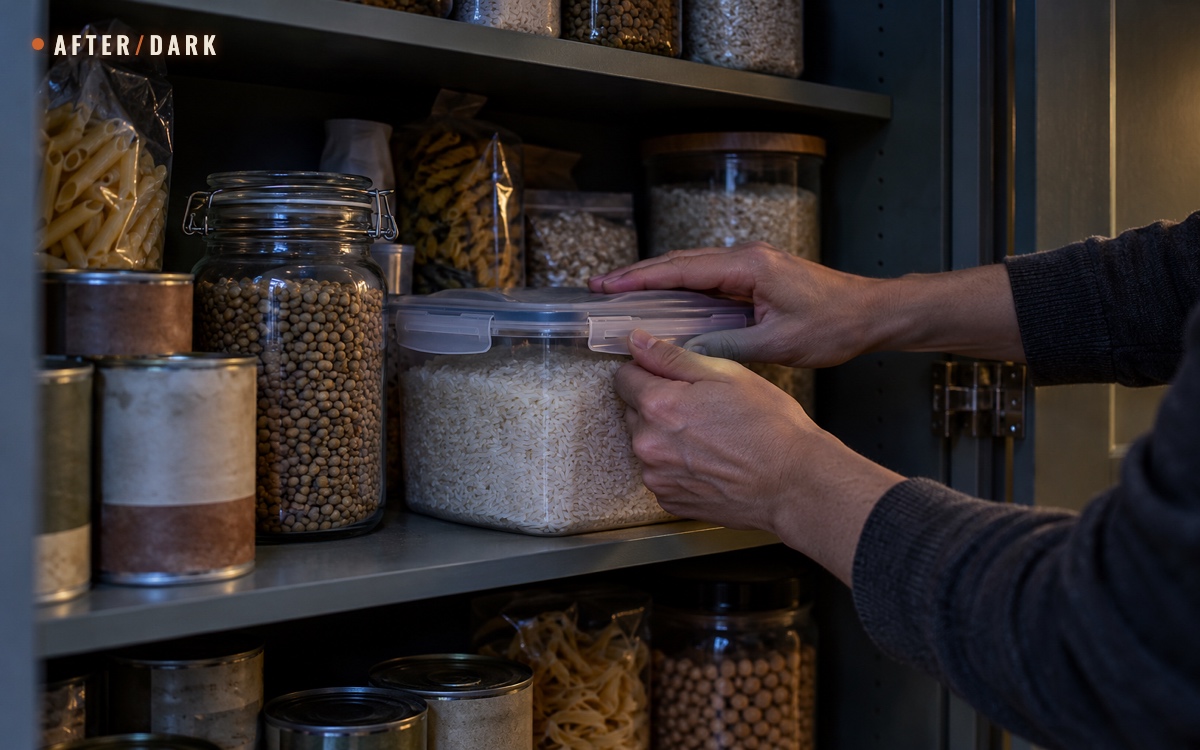
You do not need a vacuum sealer or matching storage jars to begin. Clear one suitable cupboard or shelf, bring over the groceries intended for your reserve, and work through this sequence:
- Read before rearranging. Separate items labeled “keep refrigerated” from foods that can stay at room temperature unopened. Put anything needing refrigeration back into working cold storage immediately.
- Check each package. Set aside damaged or suspect items for the inspection decisions below. Do not count them as available meals.
- Keep sound factory seals intact. Opening every packet to make the shelf look uniform creates extra handling and loses information.
- Make a use-first row. Put already-opened dry foods and packages with the earliest applicable dates where you will reach first. Keep different products identifiable.
- Record the starting count. A paper list of product, quantity, location and next-use date is enough. Add used items to the shopping list as they leave the shelf.
If you have no spare containers, leave unopened groceries in their original packs in the cleanest suitable cupboard you have. Prioritize a proper closure for the dry food you are currently using. Improve vulnerable paper or thin-plastic packaging as containers become available; do not postpone sorting the whole reserve until you can buy equipment.
Finish this first pass when every item has a home and you can identify the next package to use without unloading the shelf. That is a more useful starting point than a large inventory whose contents you cannot reach.
Choose a place that stays suitable between checks
Use a cool, dry, dark indoor location, separated from cleaning products, fuel and other chemicals. The recommended emergency-food storage range is about 4–21°C / 40–70°F. This is a storage target, not an instruction to refrigerate every dry staple or a universal discard threshold when the room becomes warmer.
Check a proposed cupboard during cooking and in the warmest part of the day. A shelf beside refrigerator exhaust, over the oven or against a sun-heated wall may be much warmer than the rest of the room. Avoid plumbing leaks, persistent condensation and damp walls. Keep food off the floor and above possible floodwater where feasible, without making heavy stock difficult to handle.
In a small apartment
Use shallow rows, with the labels facing outward. If a single cupboard cannot hold everything, split the reserve between two suitable indoor locations and write both on the inventory. A hallway cupboard can be more practical than squeezing food under a sink beside cleaning products.
Keep a small working quantity in the kitchen and the sealed refill elsewhere. Record both, so the refill is not forgotten or counted twice. The home-supply organization guide explains how to map several storage locations without blocking everyday access.
In a hot or humid home
Choose the coolest consistently dry indoor place available. A basic thermometer can help compare locations if you have one; also check for direct sun, nearby heat sources and moisture. You do not need to assume air conditioning will remain available during an outage.
When no room stays cool, change the turnover plan: keep smaller quantities of the foods you use slowly, open smaller packs, and replace them more often. Do not interpret a long storage estimate measured under cool conditions as a promise for a hot room. Tight packaging helps keep moisture out but does not cool its contents. Heat and damp storage shorten the usefulness of an emergency supply.
An attic, garage or cellar earns its place in the plan only if its actual conditions suit the food. Extra space alone is not a reason to use it.
Match the storage method to the food
“Dry food” includes products with quite different storage characteristics. The bran oils in brown rice can turn rancid during storage, so it needs faster turnover than polished white rice. Oils in nuts and whole-grain products also make a long “dry goods” deadline unreliable. Keep these foods in your normal meal rotation rather than leaving a large batch untouched for years.
Use the table to choose packaging and your next action. It draws on food-specific pantry storage guidance, with the product's own instructions taking priority. The examples are not promises of a fixed number of years.
Emergency-food storage: package choices and what changes during use.
| Food | How to store it | What to do during use |
|---|---|---|
| White rice, dry pasta and dried beans | Keep sealed packs protected; use a tightly closing food container for opened dry goods. | Retain cooking directions. Keep the current batch separate from its refill. |
| Brown rice and whole-grain flour | Keep tightly closed; use refrigerated or frozen storage when the product requires or recommends it. | Give these a shorter purchase-to-use cycle than your white-rice reserve. |
| White flour and oats | Protect paper or cardboard packs inside a suitable closed container. | Use a dry scoop; close the container after measuring. |
| Commercial cans and shelf-stable meal pouches | Leave factory seals intact; protect from crushing and punctures. | Open for the planned meal; follow refrigeration directions for leftovers. |
| Cooking oil | Keep the original bottle tightly capped, away from heat and light. | Use one bottle at a time and record opening if the label gives an opened-life limit. |
| Nuts and nut meals | Follow the label; tightly close opened packs. | Keep manageable quantities and use cold storage when instructed. |
| Dried fruit | Keep tightly closed in a cool, dark place. | Follow after-opening directions rather than borrowing a dry-grain storage rule. |
| Powdered milk | Protect the dry powder from air and moisture. | Measure with a dry utensil; mixing with water starts a different storage situation. |
Keep cooking instructions with ingredients, especially unfamiliar beans, grain mixes and products that need soaking or particular preparation. Storage success does not make every item ready to eat. If the reserve depends on cooking, check the practical setup in cooking without electricity before relying on those meals during an outage.
Keep factory packaging, or transfer it deliberately
Repackaging has a purpose when it improves protection or daily access. A sealed can already has an effective container; an opened paper bag of flour may not. A useful compromise is to place the original labeled bag inside a tightly closing food-storage container. You keep the identity and instructions without pouring every ingredient into a new vessel.
When transferring loose dry food:
- Choose a container intended for food, with an intact lid that closes properly.
- Clean it as appropriate and let it dry completely, including the lid and seal.
- Check the food and transfer one identifiable batch.
- Attach the product name, original date, opening or transfer date, and relevant storage directions.
- Keep the original label or a readable photograph, including ingredients, allergens, preparation instructions and lot code.
The lot code matters if a recall identifies a particular batch. Put a copy somewhere the household can access without your phone, such as a small envelope beside the inventory. Write the label before returning the container to the cupboard; “I will remember what this is” is a weak system once someone else starts cooking.
What about Mylar bags, oxygen absorbers and vacuum sealing?
These can be useful for a deliberately designed long-storage system, but they are not prerequisites for a rotating household reserve. Packaging methods have limits: removing air does not turn a food needing refrigeration into a shelf-stable food. Oxygen-absorber methods are intended for suitable dry products, not arbitrary moist foods.
Use a tested, food-specific method if you choose that route. Do not buy a bag or machine first and assume every ingredient can then be stored for decades. For groceries you regularly eat, a suitable cupboard, sound packaging and reliable turnover solve the immediate task with less work.
Read dates together with the storage instructions
Think of a label as three connected instructions: how to store it unopened, when to use it, and what changes after opening. Keeping all three is more useful than copying a single printed date onto a new jar.
- Best before / best if used by generally describes expected quality. Passing that date does not automatically mean an unopened, correctly stored product became unsafe that day. It also does not excuse damage, contamination or unsuitable storage.
- Use-by should be treated as a deadline to follow, not a date to extend with a smell test. Wording is not uniform across products and markets; use the full manufacturer instruction rather than assuming all printed dates mean the same thing.
- After opening may give a shorter period or require refrigeration. That instruction applies even when the printed date is months away.
The practical distinction between quality dates, use-by dates and storage conditions helps you decide what belongs at the front of the shelf. There is no need to throw away sound food early just to maintain a perfectly uniform set of dates.
For example, suppose a jar says “refrigerate after opening and use within five days.” Opening it starts that five-day period under refrigeration; the distant date on the unopened jar is no longer the whole instruction. Write the opening date on the lid. This is an example of reading a label, not a five-day rule for every jar.
If you need a product-specific storage estimate, consult the manufacturer or FoodKeeper's storage guidance. Do not assign one extra month or year to every food past a quality date. When a package's safety deadline or storage history is uncertain, resolve that uncertainty before counting it as usable reserve food.
Open food with the next meal in mind
Before opening a can, carton or pouch, decide who will eat it and where any remainder will go. Shelf-stable while sealed does not necessarily mean shelf-stable once opened. Commercial processing and an intact seal make the original storage possible; putting the lid back on does not recreate that process.
With working refrigeration, transfer unused canned food to a clean covered container and refrigerate it, following the product's opened-storage instructions. Add the opening date and put it where the next cook will see it.
Without reliable refrigeration:
- Select a package the people eating can finish at that meal.
- Open it when the meal is ready to begin, not hours in advance.
- Leave the next package sealed until it is needed.
- Do not plan to keep perishable leftovers at room temperature for the next day.
The perishable-food time limits are no more than two hours unrefrigerated, or one hour when the temperature is above 32°C / 90°F. Apply them to food that requires refrigeration after opening or preparation, not to a jar of dry rice. Refrigeration means maintaining 4°C / 40°F or below; a room that feels cool is not a substitute. Discard perishable food left beyond those limits rather than testing it by taste.
During a power failure, use the cold-food outage guide to assess the refrigerator or cooler. If it cannot maintain suitable temperatures, a large economical can may become a poor choice for one person's meal. Use smaller sealed portions from the reserve and keep the large package for a meal with enough people to finish it.
Inspect the food and fix the cause
Make a quick check while putting groceries away, then look again whenever you notice a leak, insects, unusual dampness or damaged packaging. Do not return a suspect item to its usual position while deciding what to do; separate it from the usable count.
For cans, jars and sealed pouches: check the lid, seal, seams and body. Reject leaking, bulging, punctured or badly rusted packages, broken seals, and dents affecting can seams. Do not open or taste suspect contents to investigate. The same package-integrity check matters before purchase and before use.
For dry foods: look for insects, larvae, webbing, holes or unexpected moisture. Pantry pests can enter unopened paper and thin packaging. Discard infested food, inspect nearby susceptible packages, vacuum shelf edges and cracks if power is available, and remove the vacuum contents. Without a vacuum, remove loose food debris by hand and clean accessible surfaces; inspect again because insects may remain in crevices. Let the area dry before restocking. Do not spray insecticides onto food or food packaging.
Moisture damage also calls for a location check. Find the leak, condensation or poorly dried container before replacing the food. New groceries put into the same wet cupboard will face the same problem. A new lid cannot restore food that is already spoiled or contaminated.
Subtract discarded items from the inventory immediately and add replacements to the shopping list. Otherwise the paper reserve remains larger than the meals you actually have.
Rotate one working shelf, then repeat the system
Use the package needing use soonest first, rather than blindly choosing the one purchased first. A newly bought item can have an earlier deadline than an older purchase. Put new stock behind existing stock only after checking those dates.
Here is a worked household example. The shelf holds six cans of beans, two unopened rice packs and one open rice container. Two cans have earlier quality dates than the other four.
- Put those two cans at the front. Keep the remaining four behind them with dates visible.
- Use the open rice container before starting either sealed pack. Leave the refills labeled and separate.
- When one can goes into dinner, change the count from six to five and add one can to the shopping list.
- At the next shop, compare the replacement's date with the cans already stored. Place it accordingly and restore the count to six.
- If the household consistently ignores the beans, change the replacement to a shelf-stable food it actually uses. Recalculate meal quantities in the stockpile plan instead of accumulating more unwanted cans.
This is a rotation example, not a recommendation that six cans meet a household's needs. Its useful feature is the closed loop: use, record, replace, place.
As a manageable household routine, check the working shelf during the weekly shopping-list review and do a full reserve count every three months. Those are suggested scheduling intervals, not food-safety limits; package deadlines and any damage require earlier action. Put a reminder on the inventory rather than relying on memory.
Your system is working when another person can choose the next package, find its instructions and record its use. If that requires asking you, improve the label or placement before buying more stock.
Zombie Scenario: The Pantry Still Works
Fictional scenario
A week into a fictional outbreak, the household still has food but no dependable refrigeration. The inventory shows which shelf holds the sealed meal-sized cans and which rice container is already open. Tonight, everyone eats from one can; tomorrow's stays sealed. The cook records what was used and checks the next package before putting it at the front. The reserve lasts according to its actual meal count, without hidden leftovers or forgotten supplies inflating the plan.
Frequently Asked
Can I reuse jars and takeaway tubs for emergency food?
Should I add fresh rice or flour on top of what is already in the container?
Does a sealed storage bin make food safe from flooding?
Is a very long shelf life on freeze-dried food valid after opening?
Can powdered milk replace fresh milk in an unrefrigerated reserve?
What if a product has no readable date or I cannot identify a loose ingredient?
Sources
- FoodSafety.gov — Food Safety in a Disaster or Emergency
- University of Illinois Extension — Emergency Food Supply
- Pacific Northwest Extension — Storing Food for Safety and Quality
- Utah State University Extension — A Guide to Food Storage for Emergencies
- Utah State University Extension — Storing Dried Milk
- Utah State University Extension — Food Storage Packaging
- Food Standards Australia New Zealand — Use-by and Best-before Dates
- Food Standards Australia New Zealand — Canned Foods: Purchasing and Storing
- U.S. Food and Drug Administration — Are You Storing Food Safely?
- University of Minnesota Extension — Pantry Pests: Insects Found in Stored Food
- FoodSafety.gov — FoodKeeper App
Related guides
How to Build a 30-Day Food and Water Supply for an Apocalypse
A practical 30-day pantry for apocalypse preparedness, built from person-days, package labels, a no-cook layer, and stored water you can rotate.

How to Organize and Store Emergency Supplies at Home
Turn scattered emergency supplies into a mapped, labeled home system that stays accessible, countable, and separate from your departure kit.
How to Keep Food Cold During a Long Power Outage
Build a measured cold-storage plan for the refrigerator, freezer, and coolers, with transfer triggers and official food-safety limits.