How to Build an Apocalypse Bug-Out Bag
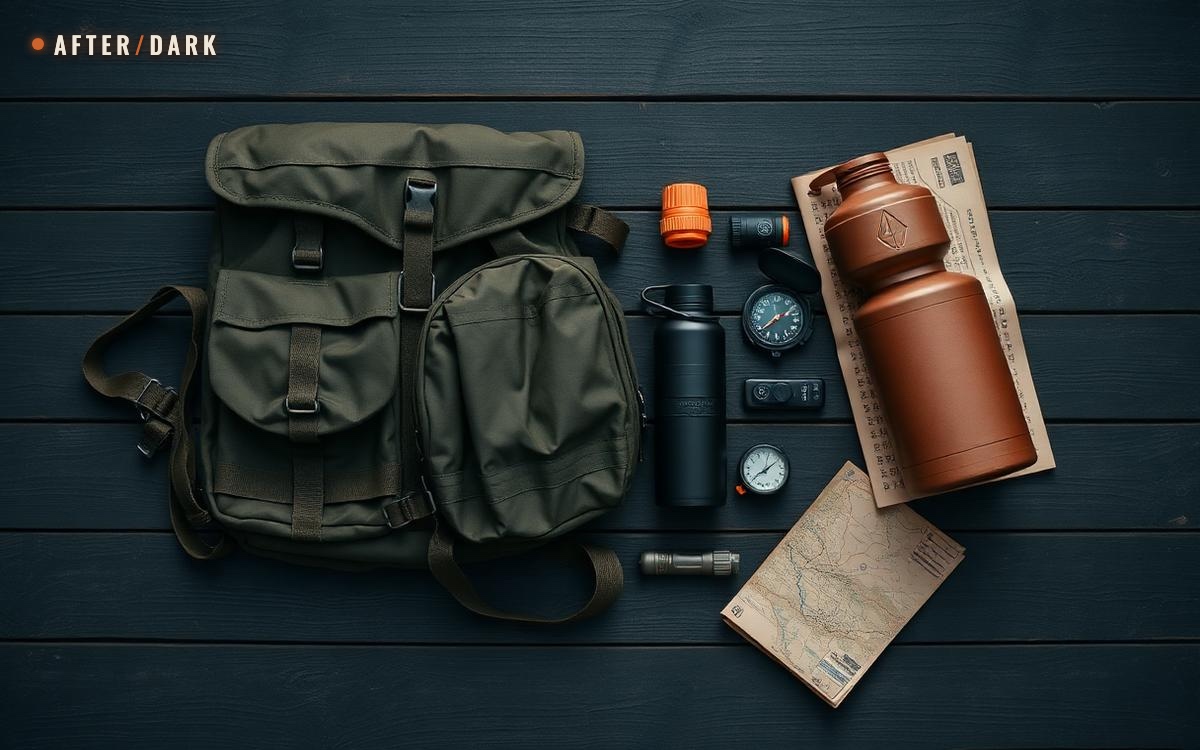
Build a portable evacuation kit around a real destination, route, household, and loaded walk test—not a generic pile of emergency gear.
Short answer
Key takeaways
- Build from a destination and route card; a packing list cannot decide where you are going.
- Choose the bag only after defining who will carry it, how they will travel, and how long the unsupported part of the trip may last.
- Carry sealed drinking water and verify every resupply assumption; portable filters do not remove every type of hazard.
- Pack by access priority so route information, light, communication, and water are available without emptying the bag.
- Use the recorded weight as a comparison point, not a universal target, and retest after any route, season, transport, or household change.
A bug-out bag is a portable evacuation system, not a complete household reserve. Build it to move from a specific starting point to a verified destination by a realistic route. The finished bag should support that journey, remain manageable for its carrier, and reveal its contents quickly when something is needed.
FEMA's emergency supply checklist is a useful starting inventory, but FEMA also says to adjust a kit for individual needs. The method below supplies the missing decisions: where the bag is going, how it will travel, what each item does, where it sits, and how the full load will be tested.
Keep long-duration supplies in the home food and water reserve. Coordinate the bag with the household stay, shelter, and leave plan so departure is a planned mode rather than a last-minute packing session.
For the site's fictional outbreak scenario, the first-day action plan explains what to do when events begin before you have assembled a bag, including how to work with the belongings already available.
Complete a Route Card Before Packing
The route determines the load. A five-kilometer walk to a known household, a cross-city public-transit trip, and a long drive to a regional destination do not need identical bags. Write the route card first and use it as the test for every later choice.
Route Card: record one usable answer for every decision before choosing the final bag.
| Decision | Record | How it changes the bag |
|---|---|---|
| Departure trigger | Official evacuation instruction or a specific condition in the household plan | Prevents delay and separates packing from the decision to leave |
| Primary destination | Address, contact, access conditions, and confirmation method | Defines the journey and what is already waiting there |
| Alternate destination | A second location outside the same immediate disruption area | Keeps one unavailable site from ending the plan |
| Primary route | Current map, distance, expected travel method, and known transfer points | Sets the normal carrying and access requirements |
| Alternate route | A route that does not depend on every part of the primary route | Provides a documented change when roads, stations, or paths close |
| Unsupported travel window | Longest realistic period before reaching verified supplies | Sets the portable water, food, power, and weather layer |
| Official information | Local alert source, transport source, and destination contact | Shows where route changes will be confirmed |
| Household responsibilities | People, pets, shared items, and who carries each one | Prevents duplication and unassigned essentials |
The unsupported travel window is an estimate, not a promise that services will return at a particular hour. Include realistic waiting and route-change time, then identify the point at which a nearer destination or different transport plan becomes necessary.
Ready.gov recommends deciding how and where you will go, learning evacuation routes, and assembling a go-bag that can be carried. If a route depends on public transportation, check the local emergency procedure before a disruption and record an alternative for a service closure.
Verify the destination
A place name is not a destination plan. Confirm the exact address, whether the household can enter, who can be contacted, whether animals are accepted, and what supplies are already stored there. Record a meeting point nearby in case the building cannot be used.
Do not count a shop, fuel station, tap, charging outlet, or transport service as available merely because it appears on a normal map. Mark it as a possible resource until the route test and current official information support the assumption.
Choose the Bag After You Know the Route
There is no universal capacity that makes a bug-out bag complete. The correct container is the smallest one that holds the tested route load, fits its carrier, works with the planned transport, and can be organized without hiding the items needed first.
Evaluate the bag as part of the route system, not as an isolated product.
| Bag test | Passing result |
|---|---|
| Fit | The intended carrier can adjust it, put it on, remove it, and use every closure without help |
| Loaded stability | The contents stay controlled during walking, stairs, sitting, and transport transfers |
| Access | Immediate-use items can be reached without unpacking the main compartment |
| Weather protection | Sensitive contents have appropriate internal protection even if the outer material becomes wet |
| Transport fit | The bag can remain with its carrier in a seat, stairwell, doorway, or other planned setting |
| Identification | The household can identify the bag and its owner without exposing unnecessary personal details |
| Repairability | Closures, straps, and attachment points can be inspected, and small problems are noticed before departure |
Do not use an empty-store fitting as the final decision. Load the actual contents, adjust the bag according to its manufacturer, and repeat the route test. If it shifts, catches on ordinary surroundings, or requires frequent repacking, change the load or container before adding anything else.
Build the Bug-Out Bag Checklist by Function
Pack functions rather than shopping categories. Each item must answer four questions: What route problem does it solve? When will it be needed? What happens if it is unavailable? When was it last checked?
Water and verified resupply
Match the equipment you pack to a complete field water-treatment process, including container compatibility, product instructions, and the time needed before a batch is ready to drink.
If the route includes natural sources, check the guide to finding and collecting water in the wild. Match the source to a collection vessel and carrying container, and keep untreated collection separate from the bag's drinking water.
Carry sealed drinking water for the unsupported travel window in containers the carrier has already used. Splitting the carried supply between manageable containers can preserve some water if one container leaks and makes it easier to distribute shared weight.
A filter is not permission to count every visible source. CDC guidance says portable filters do not remove all types of germs, and water contaminated by harmful chemicals cannot be made safe by ordinary emergency treatment methods. Record only resupply locations that can be checked, and follow current local instructions whenever water safety is uncertain.
The deeper calculation belongs in the 30-day food and water guide. The bag carries the planned travel layer; it does not attempt to move the home reserve.
Familiar, ready-to-eat food
Choose food the household already uses, can open with the equipment in the bag, and can eat without dependable refrigeration or cooking. Read the current package labels and count complete eating occasions for the planned window instead of trusting a product's headline serving number.
Prefer packages that will be finished once opened. Record preparation water separately if any food requires it; that water is part of the route budget, not an invisible extra. Include one simple comfort food when it helps children or other household members follow a difficult travel routine, but do not let snacks replace the counted plan.
Weather and rest layer
Use the route, season, and destination to choose a rain layer, warm layer, spare dry socks, practical gloves, sun protection, and a compact rest layer. The exact combination changes with climate and travel method. Inspect fit at the start of every season rather than assuming last year's clothing still works for every carrier.
Keep dry clothing and other moisture-sensitive items in internal protective bags. External rain protection for the pack can help, but it does not replace protecting the contents that would stop the plan if wet.
Light, power, information, and communication
Carry a primary light that leaves both hands available when practical, plus a compact independent backup. Standardize batteries where possible, charge the power bank on a written schedule, and keep the correct cables with it.
Store a current paper map, the route card, and a pocket copy of the tested household communication plan with the powered devices. Ready.gov recommends backup charging, emergency alerts, an out-of-area contact, and secure copies of important documents. A phone remains useful, but the plan should still show the destination and contact sequence when its battery, network, or map application is unavailable.
Documents, keys, and payment
Protect copies of essential identification, destination details, household contacts, insurance information, and transport notes from moisture. Keep only what the evacuation task requires and store digital copies securely. Do not label the outside of the bag with a home address or unnecessary personal information.
Carry the keys needed for the departure and destination, plus a modest amount of locally useful payment divided between protected locations. Ready.gov notes that cash can remain useful when payment systems are unavailable. Record any document with an expiry date in the maintenance list.
Hygiene and sanitation
Pack ordinary soap or hand-cleaning supplies, toilet paper, durable waste bags, menstrual supplies when relevant, diapers when relevant, and a small quick-dry towel. Choose quantities for the travel window and the people actually assigned to the bag.
Keep waste supplies separate from food and drinking-water equipment. Avoid transferring household chemicals into unmarked containers; the bag should not require anyone to identify an unknown liquid during an evacuation.
Route-specific tools and repairs
Include only tools tied to a named task: opening the packed food, tightening the bag's existing hardware, marking a paper map, securing a loose strap, or making a temporary nonstructural repair. A manual can opener, repair tape, compact fasteners, marker, work gloves, and the manufacturer's small repair parts may cover the actual list.
Test every tool on its intended task before packing it. Remove anything that cannot be matched to the route card, the contents, or a routine the carrier already understands.
Household and pet modules
Build the shared plan around real responsibilities: mobility or communication access, infant supplies, child identification and comfort, caregiving equipment, and items required by the destination. Use accessible written formats and assign a backup carrier for every shared module.
For animals, record an accepting destination and pack familiar food, water, a carrier or lead, sanitation supplies, identification details, and a current photo. FEMA's pet preparedness guidance says animals should be included in the evacuation plan and have their own supplies. Test the carrier and route routine under calm everyday conditions.
Pack in Three Access Zones
The packing order should reflect when an item is needed. A complete inventory is still a poor system if the map is under spare clothing or a leaking container can reach every dry item.
Three access zones keep the bag usable without repeatedly emptying it.
| Zone | When it is used | Typical contents |
|---|---|---|
| Immediate access | Before departure, at route decisions, or during a short stop | Route card, paper map, current information, light, phone, water, keys, payment, and destination contact |
| Same-day access | During planned travel breaks or a weather change | Food for the current leg, hygiene supplies, rain or warm layer, charging equipment, and pet or child module |
| Reserve | At the destination, during a major delay, or for replacement | Spare dry clothing, remaining food, backup containers, repair supplies, and protected document copies |
Use separate internal bags for documents, dry clothing, food, sanitation, and powered equipment. Label them with plain functional names that the household recognizes. Keep the heaviest items stable and follow the pack manufacturer's loading guidance rather than relying on a universal arrangement.
Nothing essential should depend on staying attached loosely to the outside. Secure excess straps and confirm that every closure remains accessible when the carrier is wearing seasonal clothing.
Give Redundancy to Functions, Not Objects
Duplicating every object makes the bag larger without necessarily making the route more reliable. Add a backup when losing one function would stop the journey and no practical alternative exists.
Use consequence and independence to decide whether backup capacity earns its place.
| Function | Primary layer | Independent fallback | Decision test |
|---|---|---|---|
| Route information | Saved current route | Paper map and written destination | Can the carrier continue if the phone is unavailable? |
| Light | Main hands-free light | Compact light with its own power | Can the carrier reach and operate the backup in darkness? |
| Communication details | Contacts stored on the phone | Printed contact card | Can a borrowed phone be used without recalling numbers from memory? |
| Water containment | Main carried water | More than one manageable sealed container | Does one leak remove the entire carried supply? |
| Power | Charged device | Labeled power bank and correct cable | Has the complete charging chain been tested? |
Two identical items with the same weak point are not independent. Record which failure the second layer covers, then remove duplicates that have no named consequence.
Test the Complete Load Safely
The test is what turns an inventory into a bug-out bag. Record the loaded weight so later versions can be compared, but do not treat that number as a universal limit or a performance goal.
- Tabletop check: match every item to the route card, assign shared items, confirm dates, and remove unexplained extras.
- Home movement check: put on the full bag, use ordinary doors and stairs, sit in the planned vehicle or transport position, and reach the immediate-access zone.
- Short walk: carry the bag on a familiar everyday route long enough to expose shifting, loose closures, inaccessible water, or unsuitable clothing.
- Route segment: test the most representative safe part of the planned route, including an ordinary transfer or stair section when relevant.
- Full route review: travel the route only when it is legal, open, and safe; otherwise use a map review and safe representative segments.
- Revision: remove, replace, relocate, or reassign every item that caused a recorded failure, then repeat the affected test.
Do not simulate dangerous conditions, enter restricted areas, disable household safety systems, or test during a real emergency. The aim is to expose ordinary logistics failures before conditions become difficult.
Route-test log: compare versions instead of arguing over a generic target.
| Record | Example of useful detail |
|---|---|
| Date and bag version | 2026-07-23, version 2 |
| Carrier and clothing | Assigned carrier, normal wet-season clothing |
| Route or segment | Home to alternate pickup point, including stairs |
| Transport mode | Walking and public-transit transfer |
| Loaded weight | Measured total for comparison with the next version |
| Item accessed | Map, water, rain layer, contact card |
| Failure observed | Strap loosened, food buried, container shifted |
| Change and owner | Repack food in same-day zone; owner retests Saturday |
If the carrier cannot complete the safe planned test comfortably, do not force the bag to meet an arbitrary list. Shorten the unsupported leg, move verified supplies to the destination, divide shared equipment differently, change transport, or remove lower-consequence items.
Adapt the Bag to the Departure Mode
The core functions remain the same, but the route card changes what “portable” means.
Choose the row that matches the primary departure mode, then test the alternate as well.
| Departure mode | Main constraint | Practical adaptation |
|---|---|---|
| Walking | Every item must be carried for the full unsupported leg | Remove route-independent extras, verify footwear and weather layers, and test the actual distance or safe representative segments |
| Car | Road access, delays, and separation from the vehicle can change the plan | Keep the go-bag portable and distinct from the larger vehicle kit; use the vehicle evacuation guide to map the car load without making essential documents or route information dependent on remaining with it |
| Public transportation | Service changes, stairs, crowds, and limited personal space | Keep the bag compact, closeable, and manageable without loose external items; record alternate stations and a non-service route |
| Apartment or high-rise stairs | Shared systems and repeated stair travel | Use the building's official routes, keep common areas clear, and include stairs in the loaded test without blocking other occupants |
| Household with shared modules | One absent carrier can remove several functions | Write the carrier on every shared module and name the reassignment before departure |
| Household with animals | Destination acceptance and controlled movement are essential | Pair the animal module with the carrier or lead, test calm loading, and confirm both destinations in advance |
A vehicle may hold a broader emergency kit, but the bug-out bag should still work if the last part of the route must be completed without it. Conversely, a walking plan should not ignore a safe transport option merely to justify carrying more equipment.
Remove Items That Create False Confidence
Use subtraction as a formal part of the build. Remove or replace:
- untested gadgets with no route-card task;
- duplicate items that do not protect an essential function;
- food the household has never opened or eaten;
- containers that leak, are difficult to handle, or hide their contents;
- bulky cooking equipment when the travel food is already ready to eat;
- outdated maps, expired documents, damaged cables, and depleted batteries;
- loose exterior attachments that catch, swing, or require constant adjustment;
- packaging that adds bulk without protecting or identifying the contents;
- supplies intended for the home reserve rather than the journey.
The bag is complete when it solves the defined trip with tested equipment—not when no more objects can fit.
Build and Verify the Bag in One Weekend
Friday: make the route decisions
- Complete the route card with two destinations and two routes.
- Confirm the people, animals, transport, contacts, and unsupported travel window.
- Check current official alert and transport sources.
- Assign every shared module to a primary and backup carrier.
Saturday: assemble and organize
- Lay out the function checklist and mark what is already owned.
- Inspect every existing item before buying replacements or additions.
- Choose the bag from the completed route load.
- Pack the immediate, same-day, and reserve zones.
- Record the inventory, locations, dates, owners, and total weight.
Sunday: test and revise
- Run the home movement and access checks.
- Complete a safe short walk or representative route segment.
- Record every shift, leak, delay, missing item, and unused extra.
- Correct the load and repeat the failed part of the test.
- Place the finished bag in the home's clear exit zone and schedule its next review.
Maintain the Route, Not Just the Contents
Food dates and battery charge matter, but a perfectly rotated bag can still fail when the destination closes, a train line changes, a child grows, or the assigned carrier is no longer available.
This is an After/Dark editorial cadence, not an official service interval; use stricter product, building, transport, and local requirements when they apply.
| Timing | Check |
|---|---|
| After every use | Restore consumed items, dry the bag, inspect closures, recharge powered equipment, and update the inventory |
| Every three months | Dated food, water containers, document dates, batteries, power banks, maps, contacts, and destination confirmation |
| Every six months | Full fit and access check, loaded route test, shared-item assignments, alternate route, and seasonal clothing |
| After any change | Carrier, household, animal, destination, route, transport service, work schedule, school, building, or local risk |
Write the next review date on the inventory rather than relying on memory. Keep the bag at the clear exit zone defined in the home-preparedness guide, but do not place it where it narrows a door, stair, or shared corridor.
Avoid the Eight Common Bug-Out Bag Failures
- Packing before choosing a destination. The result is a general collection with no journey to complete.
- Treating 72 hours as a guarantee. The route and verified support points determine the practical window.
- Copying a universal size or weight rule. The actual carrier and safe route test provide the useful evidence.
- Counting unknown water as resupply. A capacity claim does not establish that a source is safe.
- Burying immediate-use items. A map or light that requires unpacking the bag is in the wrong zone.
- Duplicating objects instead of functions. Weight grows while the same failure points remain.
- Leaving shared supplies unassigned. The household discovers at departure that one absent person carried several essential modules.
- Rotating supplies without retesting the route. The contents stay current while the plan around them quietly expires.
Zombie Scenario: The 2:14 A.M. Departure
Fictional scenario
In this fictional outbreak, an official alert changes the household mode from Stay to Leave. The primary road is closed, so the household checks the Route Card, confirms the alternate destination, and follows the documented second route. The map, light, keys, water, and contact card are in the immediate-access zone. Shared modules already have carriers. Nobody opens the reserve compartment or repacks the bag at the door because the complete load passed its route test two weeks earlier.
The fictional pressure is useful because it exposes a real standard: the bag should reduce decisions at departure. Destination, route, ownership, access, and maintenance must already be visible. When those parts work together, the bug-out bag becomes a practical evacuation system instead of an expensive container of assumptions.
Frequently Asked
How heavy should a bug-out bag be?
Is a 72-hour bug-out bag always enough?
Should every household member have a separate bag?
Is a premade go-bag enough?
Can a portable filter make any water source safe?
How often should I inspect the bag?
Sources
Related guides

How to Prepare Your Home for an Apocalypse
Turn an ordinary house or apartment into a safe, workable base without blocking exits, scattering supplies, or mistaking barricades for preparedness.
How to Build a 30-Day Food and Water Supply for an Apocalypse
A practical 30-day pantry for apocalypse preparedness, built from person-days, package labels, a no-cook layer, and stored water you can rotate.
How to Build an Emergency Communication Plan
Create a household contact system that still works when phones, power, internet, or normal meeting routines become unreliable.