How to Prepare Your Car for an Emergency Evacuation
Turn an ordinary car into a checked evacuation option with defined readiness gates, separate load layers, fixed cargo positions, and a rehearsed departure routine.

Short answer
Key takeaways
- Use the car as one transport option inside the household evacuation plan, not as the plan itself.
- Separate vehicle-resident supplies, trip-specific support supplies, and personal departure bags so maintenance and loading remain manageable.
- Assign every container a fixed position that preserves passenger seating, restraints, exits, driver controls, and visibility.
- Test the complete load from the home staging point to a road-ready vehicle under calm conditions, then correct each recorded delay.
- Define the exact condition that makes the household switch to its no-car fallback instead of improvising around an unavailable vehicle.
Preparing a car for an emergency evacuation means making it a reliable, loadable transport option before the household needs to leave. The finished system should answer five questions: Can the vehicle make the planned trip? Can every passenger use the assigned seat and restraint? Can the required modules be loaded quickly? Will the load stay controlled? What happens if the car is unavailable?
The car is not the evacuation plan. The home evacuation plan owns destinations, routes, meeting places, travel groups, and the alternate transport decision. The bug-out bag owns portable personal supplies, while the offline navigation pack owns downloaded maps, paper coverage, and the route card. This guide connects those systems to the vehicle without copying them.
Current local directions, applicable law, road restrictions, the vehicle handbook, and qualified service take priority over this article. Perform preparation and drills only under calm, ordinary conditions. This guide organizes checks and cargo; it does not teach vehicle maintenance or roadside repair.
Decide Whether the Car Is a Viable Evacuation Option
A car can extend range and carry a household load, but it also introduces dependencies: a suitable driver, accessible keys, usable parking access, enough energy for the route, current road access, and space for every passenger. Record those dependencies before buying a larger vehicle kit.
Use one viability record for the exact vehicle assigned to the plan.
The vehicle is primary transport only when every required gate has a usable answer.
| Gate | Record before departure | Fallback question |
|---|---|---|
| Driver | Primary driver, backup driver, and any conditions that limit either assignment | Who leads the group if neither assigned driver is available? |
| Access | Key location, backup access method, parking position, gate or garage dependency | Can the group reach the alternate transport without moving this car? |
| Route fit | Primary and alternate routes on the current Route Sheet | Do current instructions and road conditions still permit private-car travel? |
| Range | Household departure-range floor and the last confirmed reading | What transport or destination change applies below the floor? |
| Capacity | Occupied seats, restraints, mobility support, pet positions, and permitted cargo | Which module is removed first if the planned load does not fit? |
| Vehicle readiness | Date and result of the last routine check or qualified service | What failed condition switches the household to the backup? |
| Destination access | Confirmed arrival, parking, or drop-off point | Where does the group stop if the normal entrance cannot be used? |
Do not write CAR as the only transport entry. Use a specific vehicle and assign a backup. If two household cars share the same only driver, key location, parking gate, or blocked street, they do not create independent transport options.
UK Prepare guidance recommends planning ahead, checking the vehicle before travel, checking current traffic and weather information, keeping an emergency kit, and telling a contact the destination and expected arrival. Those are ordinary travel habits. The evacuation plan makes them repeatable when the household is under time pressure.
Create a Vehicle-Readiness Baseline
A departure check is too late to discover that a known warning, overdue inspection, damaged restraint, or inaccessible spare key has been ignored. Establish a normal readiness baseline and keep proof of the most recent review with the household plan.
The UK driving standard directs drivers to use the manufacturer's handbook and guidance, confirm the vehicle is suitable for the journey, make routine safety checks, and ensure passengers and loads can be carried safely. Use that principle across vehicle types rather than copying one universal mechanical checklist.
The readiness record names what must be confirmed; the handbook or a qualified professional determines how.
| Readiness area | Record | Pass evidence | Escalation |
|---|---|---|---|
| Required status | Registration, inspection, insurance, permits, or equipment required where the vehicle is used | Current records and locally required items are present | Resolve through the relevant authority or provider |
| Driver view and controls | Glass, mirrors, cameras if fitted, lights, indicators, controls, and warning displays | Normal operation confirmed according to the handbook | Use qualified service for an unexplained fault or damage |
| Tyres and road contact | Condition and pressure checks required by the handbook, including any assigned spare or mobility system | Check completed and recorded | Use qualified service when the result is outside guidance |
| Fluids and energy | Handbook-defined fluids plus fuel, charge, or other normal energy state | No unresolved warning; range is above the household floor | Replenish normally or change the transport plan |
| Passenger system | Required seats, belts, approved child seating, doors, and accessibility equipment | Every assigned occupant can enter, sit, secure, and leave | Correct the assignment or obtain appropriate professional guidance |
| Cargo system | Cargo floor, cover, partition if fitted, anchor points, and permitted load | Required attachment points and load space are usable | Follow manufacturer guidance; do not improvise structural anchors |
| Seasonal fit | Climate- and route-appropriate ordinary vehicle equipment | Local requirements and manufacturer guidance are met | Update before the season or change the route/transport choice |
The household record needs a result and a date, not a tutorial. Use entries such as PASS — handbook check completed 2026-09-06 or NO-GO — warning requires qualified review. Never turn an unresolved condition into probably fine because departure feels urgent.
Set a departure-range floor
Avoid a universal tank or battery percentage. Vehicle efficiency, temperature, traffic, elevation, load, route length, charging or refuelling access, and the destination all change usable range.
Build the household floor from four parts:
PRIMARY ROUTE + PLANNED ALTERNATE + EXPECTED DELAY + RESERVE = DEPARTURE-RANGE FLOOR
This is an After/Dark planning formula, not a manufacturer specification. Use the vehicle's normal range information and handbook to translate the route into a conservative household trigger. If the indicated range is below the floor, the plan must say whether to replenish through an ordinary safe option, use a nearer confirmed destination, or change transport. Do not assume that a station or charging point visible on a map is open or reachable during a disruption.
Record the floor on the vehicle card, then review it whenever the route, destination, season, load, or vehicle changes. The purpose is to prompt routine readiness before an emergency, not to calculate a precise last kilometre during one.
Build a Three-Layer Vehicle Load System
An emergency car kit becomes hard to maintain when permanent supplies, travel items, household bags, and ordinary clutter are mixed together. Separate the load by where it belongs and when it enters the car.
Three layers keep the car useful on an ordinary day and fast to load on a departure day.
| Layer | Storage location | Purpose | Examples of functions |
|---|---|---|---|
| 1. Vehicle-resident | In the car when storage conditions permit | Supports the vehicle and a delay during normal travel | Local required items, handbook, basic visibility and information items, compact seasonal layer, small cleanup supplies |
| 2. Travel-support | Controlled storage at home near the loading route | Adds supplies for the planned journey and its passengers | Sealed drinking water, familiar shelf-stable food, extra clothing or blankets, charging module, sanitation module |
| 3. Departure-only | Assigned home staging point or with the carrier | Moves with a person, pet, or household responsibility | Tested personal bags, pet module, protected document module, route copies, accessibility support |
Layer 1 should be small enough to inspect without emptying the cargo area. Government of Canada car-kit guidance includes water, food that will not spoil, blankets, clothing, a light, maps, an emergency-plan copy, and vehicle-related equipment. Adapt those broad categories to local conditions, the vehicle, and the household instead of using the page as a universal shopping list.
Read every storage label. A product that cannot tolerate the heat, cold, moisture, or vibration expected inside the parked car does not belong in the permanent layer. Move it to controlled home storage and mark it as a departure-only item. Inspect containers for leaks, swelling, damage, pests, depleted power, and expired dates on the household schedule.
Layer 2 is prepared for the route but remains out of the vehicle until needed. Keeping it as one or two labelled modules prevents loose bottles, clothing, cables, and packages from being collected independently. Do not count the same physical supply in both a home reserve and the car plan without recording when and by whom it moves.
Layer 3 remains portable. A personal bag should not become inaccessible beneath a larger vehicle load, and essential route information should not work only while the group stays beside the car. If the vehicle becomes unusable, each travel group takes its assigned portable modules and follows the recorded fallback.
Give Every Container a Fixed Cargo Position
Packing by available space produces a different load every time. Packing from a load map produces a testable system. Sketch the cargo area from above and label a position for each module before the rehearsal.
Start by protecting five no-cargo zones:
- the driver's seat, footwell, controls, and normal field of view;
- every occupied passenger seat and restraint path;
- each normal door, hatch, and planned exit path;
- the space required for a mobility device, child seating, pet carrier, or other assigned support;
- the manufacturer's airbag and cargo-control areas described in the handbook.
Then assign the usable cargo space by access order.
The load map answers where an item goes and when it must come out.
| Zone | Use | Placement rule |
|---|---|---|
| Driver information | Checked before movement while safely parked | Route Sheet and vehicle card are readable without unloading cargo and stored where they do not obstruct controls |
| First-out zone | Needed at the first stop or immediately after leaving the car | Assigned bag, map set, communication module, and destination handoff remain individually removable |
| Passenger-support zone | Used during a planned stop | Water, familiar food, clothing, and sanitation module can be reached without moving the deep load |
| Deep cargo zone | Needed at the destination | Stable, lower-priority containers are placed low and do not block first-out modules |
| Empty reserve | Absorbs a changed passenger or required household item | A defined area remains unused rather than being filled with optional objects |
Keep the load within the limits and arrangement specified for the vehicle. NHTSA advises drivers to secure cargo, avoid overloading, and double-check that a load cannot fall, shift, leak, or otherwise leave the vehicle. Apply that same control mindset inside the cargo area: use manufacturer-approved features, close containers, and retest the complete arrangement.
Do not let a heavy container sit loose behind an occupied seat. Do not stack cargo until the driver loses the required view or the rear hatch cannot close normally. Do not rely on a blanket, friction, or the weight of another bag as the only control. If the planned load cannot be secured with the vehicle's intended system, reduce or reconfigure it according to manufacturer guidance rather than adding improvised attachment points.
Use a first-out sequence
Write the unloading sequence beside the load map:
ROUTE COPY → PERSONAL BAGS → PET OR ACCESSIBILITY MODULE → TRAVEL SUPPORT → DEEP CARGO
Change the order to match the household, but test it literally. One person should be able to remove a first-out module without placing other bags in traffic, separating an animal from its handler, or exposing protected records unnecessarily.
Photograph the passing cargo arrangement for household reference, but do not make the photo the only plan. Label modules with simple functional IDs such as CAR-1, TRAVEL-A, and PET-B, then put those IDs on the loading card.
Preserve Passenger, Pet, and Accessibility Space
Seats are not spare shelves. Assign every expected occupant before assigning the cargo area, including the driver, children, anyone who needs additional boarding time, and any animal travelling in a carrier.
Create a passenger map with one row per seat or approved position.
The passenger map reserves people and support space before cargo is assigned.
| Position | Assigned occupant or function | Entry order | Support owner | Exit check |
|---|---|---|---|---|
| Driver | Named primary or backup | After the external load check | Self or named support | Controls and view unobstructed |
| Front passenger | Navigator or passenger | Household-specific | Named person | Route information secured before movement |
| Rear positions | Named occupants and approved seating | Slowest or most assisted order recorded | Primary and backup helper | Belt or approved restraint usable without cargo interference |
| Cargo-area animal position | Assigned carrier where the vehicle and local rules permit | Before surrounding modules | Named handler and backup | Carrier remains controlled and removable |
| Accessibility position | Named equipment and transfer space | Tested calm sequence | Named support and backup | Equipment and exit path remain usable |
Follow applicable law and manufacturer instructions for seating, restraints, carriers, and equipment. The article does not prescribe a universal position because vehicles, local rules, and household needs differ.
The pet emergency kit and evacuation guide owns carrier selection, destination acceptance, records, familiar supplies, and the calm transport drill. The vehicle card needs only the animal, handler, backup, carrier ID, position, and loading order.
Test normal door opening, boarding, restraint use, and exit with the complete planned load. If a container must be moved before an assigned passenger can sit or leave, the load map fails. If one absent helper makes boarding impossible, the transport plan needs a named backup or a different vehicle arrangement.
Connect Navigation, Power, and Communication
Prepare information before placing the first container in the car. A working vehicle can still fail the household plan if the route exists on one uncharged phone, the destination address is buried in cargo, or nobody outside the vehicle knows where the group is going.
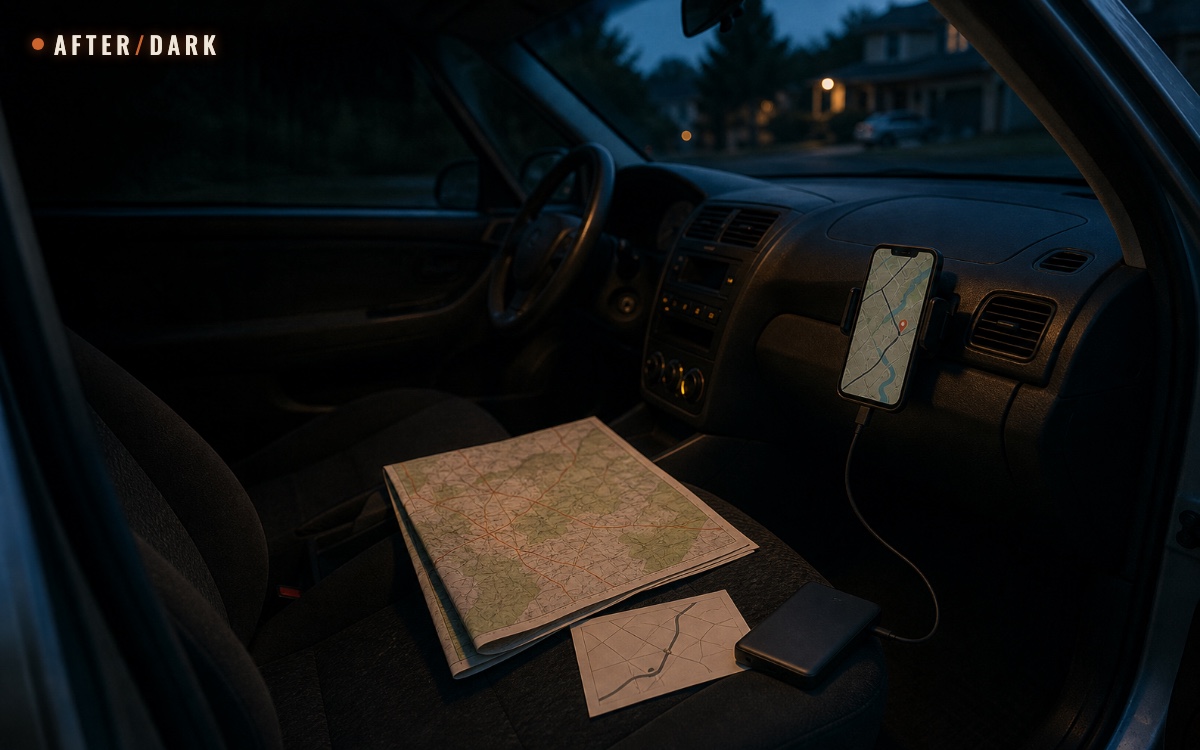
Use the offline-map preparation guide to build and test the complete route corridor. For the car, record only the handoff details:
- primary and alternate route IDs;
- destination address and verified arrival point;
- decision points where the group changes route or transport;
- assigned navigator;
- exact digital download, paper map, and Route Sheet versions;
- tested device position and charging connection;
- current official road or transport information source.
Review devices and maps only while safely parked or through the assigned passenger navigator. A driver should not handle a device while the vehicle is moving. Current closures, restrictions, and authority directions override every prepared map.
Before departure, the communication lead sends the planned short update to the named contact. A useful household format is:
GROUP A / VEHICLE 1 / LEFT 17:40 / DESTINATION B / ROUTE 2 / NEXT CHECK 18:30
This is an editorial example, not an official standard. Use the household communication plan to define the real contact order, message format, and missed-check procedure. Keep private information to the minimum needed by each copy.
Run a Door-to-Road Loading Rehearsal
The vehicle passes only when the household can move the planned load from its real storage locations into a road-ready arrangement. Run the first rehearsal in daylight, in normal weather, on private property or another lawful safe location. Do not imitate danger, rush people, or create a roadway obstruction.
Stage zero: reset the car
Remove ordinary clutter that is not part of the plan. Confirm the resident module is complete, the planned cargo positions are available, and every assigned seat can be used. Start the timer only after the car and home modules are in their normal storage positions; a pre-opened hatch and staged driveway do not test the real task.
Stage one: activate the plan
One person reads the current vehicle card and announces the assigned destination, route ID, transport decision, and driver. This is not a dramatic countdown. It confirms that the household is loading the same version of the plan.
Stage two: move modules in order
Each owner retrieves the assigned module and takes it directly to its mapped position. Use ordinary doors, stairs, lifts, gates, and parking access exactly as the household normally would. Do not block a shared corridor or leave modules unattended in a public area.
The observer records:
- the time each module reaches the vehicle;
- any missing key, label, owner, or backup;
- any container carried twice because its position was unclear;
- any doorway, stair, gate, or hatch conflict;
- any seat or restraint blocked by cargo;
- any first-out module blocked by a later load;
- any item that leaks, rolls, tips, shifts, or cannot be secured as planned.
Stage three: complete the static departure check
With the vehicle still parked, load passengers through the tested calm sequence. Confirm assigned seats and support space, close every door and hatch normally, check the driver's controls and view, and retrieve the Route Sheet and first-needed module. Walk around the stationary vehicle and recheck the load according to the manufacturer guidance.
Stage four: reset and correct
Unload the vehicle, return everything to normal storage, and repair the plan rather than hiding the delay. Change the module size, label, owner, position, or storage point that caused the problem. Then repeat only the failed section until it passes, followed by one complete rehearsal.
Record the result as a version:
The rehearsal log preserves the observed result and the correction owner.
| Field | Example format |
|---|---|
| Vehicle card | CAR-A / v3 / 2026-09-10 |
| Route and destination | R2 / LEVEL B |
| Planned modules | CAR-1 / TRAVEL-A / BAG-1 / BAG-2 / PET-B |
| Start to static-ready time | Actual observed time, not a target copied from another household |
| Failures | Exact delay, obstruction, unsecured item, or missing assignment |
| Corrections | Change, owner, due date, and retest result |
Do not turn rehearsal time into a competition. A faster load that skips a passenger check or leaves cargo uncontrolled is a failed version. The goal is a predictable sequence with fewer decisions, not speed at any cost.
Use a Short Departure Check
The baseline is maintained before an emergency; the departure check confirms what may have changed today. Keep it short enough to scan without repeating the entire handbook.
Vehicle departure card: stop at the first failed gate and use the written correction or fallback.
- Direction: Current local instructions permit the planned departure and route.
- Vehicle: No known unresolved condition or warning conflicts with the handbook or readiness record.
- Range: The indicated range meets the household floor for the selected route and fallback.
- People: Driver, passengers, helpers, and animals match the current travel-group list.
- Seats: Every occupied position, required restraint, and support space is usable.
- Load: All assigned module IDs are present, in mapped positions, closed, and controlled.
- Access: Driver controls, view, doors, hatch, and first-out modules remain available.
- Information: Current Route Sheet, offline map, paper map, destination, and contact are confirmed.
- Message: The departure update and next check time have been sent or assigned.
- Fallback: The group knows the exact trigger and action if the vehicle or route becomes unavailable.
A failed check does not always mean waiting. The written plan may remove an optional module, select a confirmed alternate route, change destination, or move the group to the no-car transport option. The correction must already fit the household plan and current instructions.
Maintain the Vehicle System
Vehicle readiness changes when the car is serviced, borrowed, reorganized, used for a long trip, exposed to seasonal extremes, or assigned to a different household group. Link the article system to normal vehicle care instead of inventing a separate mechanical schedule.
Use three maintenance triggers:
- Monthly household check: confirm key access, range floor, module presence, labels, obvious container damage, date-sensitive contents, light and power status, and clear passenger/cargo space.
- Seasonal review: update clothing, water and food rotation, weather-related supplies, route assumptions, and anything whose storage label conflicts with expected vehicle conditions.
- Immediate review: inspect and reset after use, a spill, extreme temperature exposure, vehicle service, a driver change, a route or destination change, or a new passenger, pet, restraint, or accessibility requirement.
These are After/Dark editorial triggers, not service intervals. The vehicle handbook, qualified service, applicable inspection rules, and item labels determine the actual technical requirements.
Use a single inventory with five columns: MODULE / POSITION / OWNER / LAST CHECK / NEXT ACTION. When an item leaves the resident layer for ordinary use, mark it out. An empty space that looks occupied in an old photo is not readiness evidence.
Run the complete loading rehearsal twice a year as a starting household cadence and after any major change. If the car is used rarely, add a calm normal drive and access review that follows local law and the handbook. Do not begin a test in unsafe weather or during an actual evacuation.
Build a No-Car Fallback That Uses the Same Modules
The backup should not require repacking the entire household. Define which layers move when the car does not.
The fallback keeps portable responsibilities intact and leaves vehicle-dependent extras behind.
| Vehicle status | Modules taken | Modules left | Plan action |
|---|---|---|---|
| Car passes | Resident, travel-support, and assigned departure modules | Optional items that failed the load map | Follow the selected vehicle route |
| Car unavailable before loading | Personal, pet, document, and assigned shared portable modules | Vehicle-resident and car-only travel support | Move to the named alternate transport start point |
| Route rules out private cars | Portable modules permitted by the alternate mode | Bulky vehicle-only modules | Follow current instructions and the recorded alternate route |
| Vehicle becomes unavailable after departure | First-out portable modules | Deep cargo that cannot be moved safely | Account for the group, send the status update, and use the planned handoff |
Do not rely on an unspecified taxi, ride from a neighbour, or public service as the only fallback. Confirm the alternative in the home evacuation plan, including the start point, capacity, route, group assignment, and method used to check current availability.
If a wildfire evacuation message arrives before that fallback is arranged, the guide to responding without a car or an arranged ride explains what to tell the local assistance contact and which pickup details to confirm.
The fallback trigger should be observable: vehicle does not pass the departure card, assigned driver unavailable, parking exit inaccessible, current direction excludes route, or planned passenger position cannot be used. Avoid a vague instruction such as try the car first, which encourages delay without defining a stopping point.
Fix the Common Vehicle-Evacuation Failures
Each failure should produce one specific change and a retest.
| Failure | Why the plan breaks | Correction |
|---|---|---|
| The car contains one large mixed kit | Nobody knows what is permanent, trip-specific, portable, expired, or missing | Split the inventory into the three load layers and label each module |
| Cargo is packed by empty space | Every departure creates a new arrangement and first-needed items become blocked | Draw fixed cargo positions and a first-out sequence |
| The rear seat becomes storage | A late passenger, child seat, helper, or animal has no usable position | Assign occupants before cargo and protect all required seat space |
| Route information stays in one phone | Battery, account, or device loss removes destination and route access | Use tested offline coverage, a paper map, and a current Route Sheet |
| The car is called the backup | The plan names no driver, key, access path, range, or loading sequence | Complete the viability gates for the exact vehicle |
| Permanent supplies cannot tolerate the car | Heat, cold, vibration, or moisture damage contents between checks | Follow storage labels and move unsuitable items to the departure-only layer |
| Everything fits but nothing is controlled | Containers shift, leak, block access, or affect visibility | Reduce and secure the load under manufacturer guidance, then retest |
| The drill starts with bags beside the car | Retrieval, stairs, keys, gates, and household handoffs are never tested | Begin with the vehicle and modules in their normal locations |
| The group keeps solving a failed departure check | Delay grows while the confirmed alternate is ignored | Write an observable fallback trigger and practise the switch |
| The cargo photo becomes the plan | A photo cannot show owners, dates, missing modules, or changed passenger needs | Maintain the written load map and version record |
Zombie Scenario: The Car Packed in the Wrong Order
Fictional scenario
On the third evening of a fictional zombie outbreak, the household receives an instruction to leave its area. The car itself is ready, but the first loading attempt puts two large supply containers across the rear seat and buries the paper route pack beneath them. The pet carrier has no fixed position, and the backup driver cannot find the spare key.
The group stops using the improvised arrangement and follows vehicle card
CAR-A / v3. The rear seat is cleared for its assigned passengers. The pet module goes into its tested position with the named handler. Personal bags enter the first-out zone, the compact travel-support bin goes into deep cargo, and the Route Sheet stays with the passenger navigator. The backup key is retrieved from its recorded location.Before movement, the driver checks the route ID, range floor, normal controls and view, occupied seats, closed hatch, and current instruction. The communication lead sends the departure message. The load takes slightly longer than the household hoped, but every person, module, and fallback is accounted for without inventing a new plan at the driveway.
The fictional pressure exposes an ordinary logistics failure: the household owned supplies but had not assigned space, order, access, or backups. The practical fix is the same outside fiction—separate the load layers, map the positions, rehearse from real storage, and use any failed gate as a plan change rather than an invitation to guess.
Complete the Vehicle Evacuation Card
Before calling the car prepared, confirm that the household can answer every line:
- Is the exact vehicle named in the current evacuation plan?
- Are the primary and backup drivers, key locations, parking access, and no-car fallback recorded?
- Has the normal vehicle-readiness review been completed under the handbook and applicable requirements?
- Is the household departure-range floor based on the current route, alternate, delays, and a reserve?
- Are resident, travel-support, and departure-only modules separate and inventoried?
- Does every container have a fixed position and access order?
- Are every occupied seat, restraint, exit, control, and required view preserved?
- Can first-out portable modules leave the vehicle without unloading deep cargo?
- Do digital maps, paper maps, Route Sheets, power, and communication assignments use the same plan version?
- Has the complete door-to-road rehearsal passed from normal storage locations?
- Does the departure card name a clear action for each failed gate?
- Can the travel group switch to the no-car fallback using the same portable modules?
The car is prepared when the household can load, check, and leave through a tested sequence while preserving a usable alternative. More cargo does not make that system stronger. Clear ownership, controlled placement, current information, and a rehearsed fallback do.
Frequently Asked
What should be kept in a car for an emergency evacuation?
Is an emergency car kit the same as a bug-out bag?
How full should the fuel tank or battery be for evacuation readiness?
Where should emergency supplies be packed in a car?
Should evacuation supplies stay in the car all year?
What if the household car is unavailable when evacuation begins?
Sources
Related guides

How to Make a Home Evacuation Plan
Turn exits, routes, destinations, transport, household roles, and meeting places into one practical evacuation plan that works without mobile data.

How to Build an Apocalypse Bug-Out Bag
Build a portable evacuation kit around a real destination, route, household, and loaded walk test—not a generic pile of emergency gear.
How to Prepare Offline Maps for an Emergency Evacuation
Build a three-layer navigation pack that keeps household routes, destinations, and decision points usable when mobile data is unavailable.