How to Start a Fire Without Matches or a Lighter
A practical route from raw materials to an ember and a small fire, including what changes when you have no tools, usable cord, wet wood or no success.
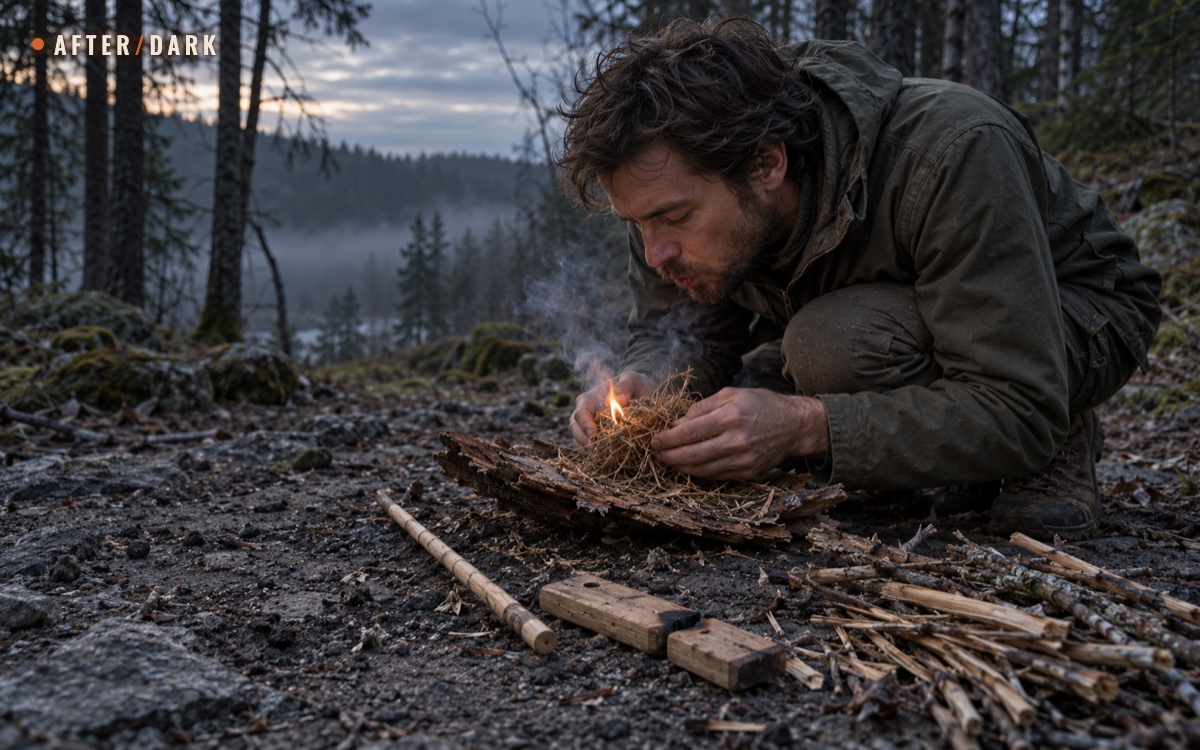
Short answer
Key takeaways
- Prepare the whole fire before attempting ignition: ember-making materials, a tinder nest, fine kindling and sustaining fuel.
- A hand drill needs no cord, but its spindle, socket and dust-collecting notch still need to be made from suitable materials.
- Smoke during drilling is progress; an ember must continue smouldering after the drill stops.
- Change a failed component or technique before repeating an exhausting attempt with the same setup.
- Keep the fire small, attend it continuously and leave only when all its remains are extinguished and cold.
Starting a fire without matches or a lighter involves three separate jobs: producing an ember, turning that ember into flame, and giving the flame enough suitable fuel to continue. The last two deserve as much preparation as the first. An ember is easily wasted while you search for something to burn.
This guide starts with someone who has no fire-making kit or carried tools. It then explains what usable cord, a prepared set or a lens changes. The aim is a small, controlled outdoor fire made with the resources actually available to you.
If you have no equipment, start with the materials
You have only your clothes and what you can collect nearby. Start by choosing a working position you can return to easily, then inspect the immediate area for three things: fine dry fibers, dead wood suitable for a drill and hearth, and dry twigs to feed a flame. Put promising pieces together before doing the tiring work of drilling.
For the hand drill, the spindle is a straight wooden stem rotated between your palms. The hearth is the wooden base beneath it. You also need a small piece of bark or a leaf to receive the ember. None of these has to come from a shop, but a usable hearth requires a socket and a place for hot dust to collect. The preparation section below explains that work, including the natural-tool option. This is a practiced skill: assembling a working set from found wood is a substantial task in its own right.
Keep your search local. If you are lost, do not turn material collection into another unmarked journey. Follow the plan for being lost in the woods alongside this task; producing fire does not establish where you are or which direction to travel.
Decide whether you can manage the fire you are trying to make
Use an established permitted fire site when one is available. Otherwise, check the area's rules and the actual ground and weather. Avoid combustible ground such as peat, deep leaf litter or roots, overhead vegetation, and hazardous dry or windy conditions. A damp surface does not establish that the material beneath it cannot burn. Follow campfire location and preparation guidance.
Arrange extinguishing water and a way to apply it before ignition. A nearby stream is not an extinguishing supply if you have no way to bring water to the fire. Without that arrangement, preparing materials or practicing the movements is possible, but starting a fire adds a problem you have not solved. Use the no-fire plan later in this guide while you address the missing resource.
That distinction matters for every method: being able to create heat and being able to manage an outdoor fire are separate capabilities.
Choose an ignition method from the resources you actually have.
| Your resources | A possible route | What must be ready first |
|---|---|---|
| No carried equipment | Hand drill made from found materials | Suitable dry wood, a way to shape the hearth, prepared tinder and fuel, and a controllable site |
| Usable cord and a shaping tool | Bow drill | Hearth, spindle, bow and secure bearing block; cord that grips without failing |
| A familiar, prepared friction set | Use the set you know | Dry working surfaces, tinder and fuel; check worn sockets and cord before starting |
| A converging lens and strong direct sun | Focus sunlight onto fine tinder | A stable bright focal point, protected tinder and enough uninterrupted sunlight |
| Wet materials, strong wind, or no way to extinguish a fire | Secure a place to wait without fire | Weather protection, a visible position and a plan that does not depend on ignition |
Prepare tinder, kindling and fuel before drilling
Keep three separate piles within reach. This prevents the common mistake of producing a tiny flame beside a collection of sticks too large for it to ignite.
- Tinder receives the ember. Use very dry, finely divided plant fibers that can form a loose nest: suitable dry grass or fibrous bark from dead material, for example. Rub and tease the fibers apart by hand. Put the finest material in a small hollow at the center, supported by coarser fibers around it.
- Kindling receives the flame. Gather dead, dry twigs, beginning with the thinnest pieces you can find and progressing to pencil-sized sticks. A clean, crisp snap is a useful selection clue; a soft, wet or rotten piece is a poor starting choice.
- Fuel keeps the fire useful. Have larger dry sticks ready for when the kindling is burning. For this small fire, choose manageable pieces you can collect and break without needing an axe or saw.
This separation of fuel sizes and preparation of a tinder nest lets you move through ignition without leaving the working position. Keep the piles off wet ground on available dry bark or another dry surface.
Test the arrangement before making an ember: can you reach the nest without knocking the hearth, place it in the fire site, and add fine twigs without searching? Clear that small working area now. Leave space between the first twigs so you can insert burning tinder and air can reach it.
Make and use a hand drill from natural materials
This is a friction method. The rotating spindle wears fine dust from the contact surfaces. Continued friction can heat that dust into a smouldering ember, which must then ignite the tinder. It does not usually produce a flame directly beneath your hands.
Find wood you can actually shape
Choose a straight, dry spindle with a sound working end and a surface you can roll comfortably. It needs enough length for your hands to travel downward while rotating it. Scrape away rough projections that catch your palms; choose another stem if it is too crooked to stay in the socket.
For the hearth, look for sound, relatively soft dead wood with a stable face. A naturally split piece can reduce the shaping work. Rotten wood that collapses under pressure will not provide a reliable socket. Dryness and the particular wood pairing matter more than memorizing one supposedly universal tree species: practical hand-drill experiments show substantial differences between combinations.
With no carried cutting tool, inspect available stones for a usable natural edge or point. Use that edge to scrape a shallow depression in the wood, keeping your holding hand out of its path. Stone implements have been used to prepare hand-drill sockets; this still takes suitable material and work. If the wood cannot be shaped with what you have, replace the piece or stop that attempt rather than assuming hand pressure will create the missing geometry.
Prepare a socket and a dust-collecting notch
- Stabilize the hearth. It must stay put under pressure. Position a shallow starter depression near an edge, with enough wood around it to support the spindle.
- Seat the spindle. Give its lower end a blunt, rounded contact surface. Turn it in the starter depression to wear a matching socket; this preliminary shaping is not the final ember attempt.
- Open the notch. Scrape or cut a wedge from the hearth's edge into the socket. It needs to let dust fall and accumulate underneath while leaving enough socket to hold the spindle upright.
- Position the catcher. Slip a small leaf or thin bark piece beneath the notch so the resulting pile can be transferred without being scattered into the ground.
The socket-and-notch design both holds the spindle and gathers the hot dust. A narrow decorative scratch beside an otherwise closed hole does not do that job. Test that dust can reach the catcher before investing a prolonged effort.
Rotate, build heat and recognize the ember
Kneel or sit in a stable position, holding the hearth down while keeping the spindle upright. Place it between your palms. Roll your hands back and forth while pressing downward; as they descend, return them promptly to the upper part and continue. This combination of rotation and downward force produces the friction.
Begin with controlled movements that keep the spindle seated. Build speed and pressure once it turns steadily and dust is collecting. If the spindle keeps jumping out, correct the seating or posture before trying harder. You need repeatable movement, not an occasional burst followed by rebuilding the entire setup.
Watch the dust pile, not just smoke at the contact point. When the pile continues smoking after you stop and carefully lift away the spindle, you may have an ember. Let it hold together and develop; gently move the hearth clear without breaking up the pile. A dull glow can confirm progress, but may be difficult to see in daylight.
If the smoke immediately dies and no ember persists, leave the tinder alone and diagnose the attempt. The next section begins only once there is a smouldering coal to transfer.
Turn the ember into a flame that lasts
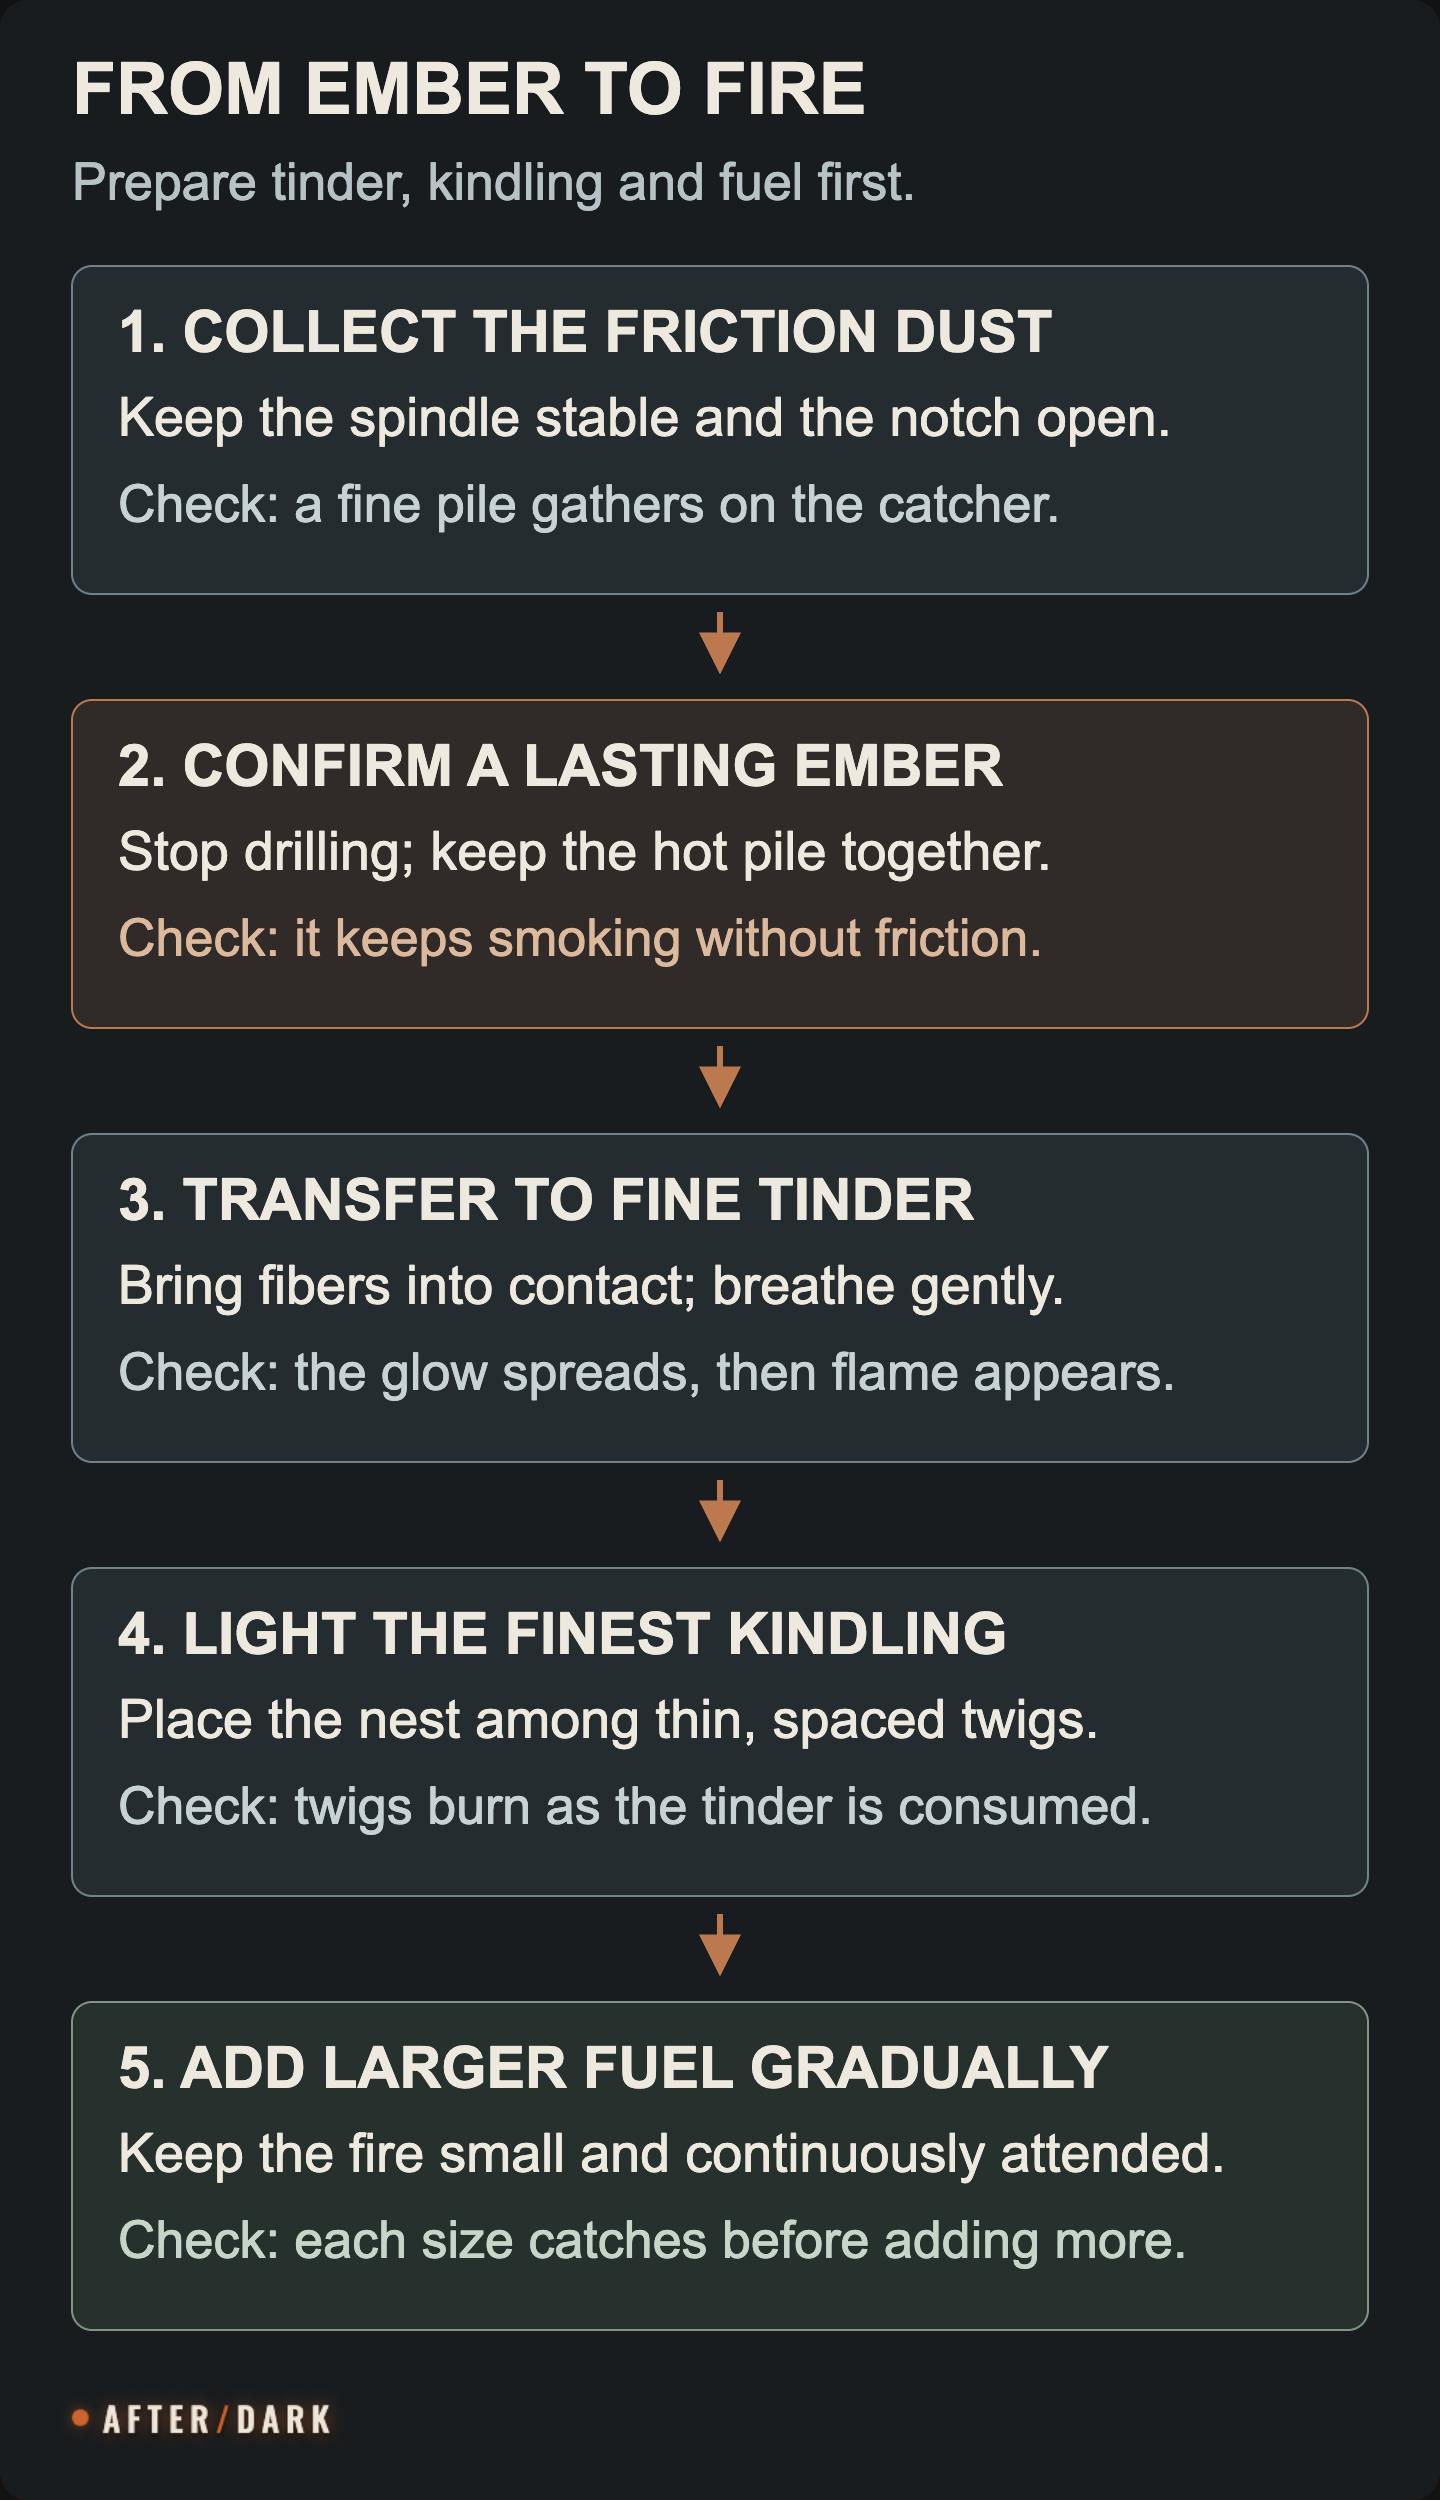
Bring the prepared tinder nest beside the catcher. Tip the cohesive ember into the finest fibers at its center, keeping the pile together. Fold surrounding fibers loosely toward it while preserving an air path. Support the nest over the cleared fire site, with hands away from the glowing center.
Give it gentle, directed breaths. Watch for the glowing area to spread and the smoke to increase. Adjust the nest so fibers contact the ember without compressing it into a tight plug. Blasting a loose dust pile apart loses the heat you worked to accumulate.
As flame appears, place the burning nest into the prepared kindling. Add the finest twigs first, with gaps between them. Let those catch before introducing the next size. A large stick laid across the first weak flame can interrupt the transition; the fire needs burning material of its own before it can take heavier fuel.
The useful endpoint is kindling burning after the tinder has been consumed. Then gradually add larger pieces, keep the fire small and stay with it. The basic fire-building sequence depends on this progression from easily ignited material to sustaining fuel.
If you have usable cord, make a bow drill
A bow drill uses a cord to rotate the spindle, leaving the other hand to apply pressure through a bearing block. It can make sustained rotation easier, but it adds components. A shoelace is useful only if it is long and strong enough for the task; do not dismantle footwear you still need simply because a guide mentions string.
Assemble the working parts
You need the same basic hearth and notch, plus a shorter, stouter spindle, a bow, cord and a bearing block: a comfortable handhold with a depression supporting the top of the spindle. The top must turn within that depression without escaping into your hand.
Select a strong, slightly curved stick for the bow. Secure the cord at both ends, leaving enough length to wrap once around the spindle. Adjust tension so the cord turns the wood instead of sliding along it, while still allowing a smooth stroke. A hard wooden bearing block with a fitted socket supports downward pressure. These are distinct parts of a working bow-drill set, not optional accessories.
Operate it steadily
- Wrap the spindle once in the cord, then seat its lower end in the hearth and its upper end in the bearing block.
- Hold the hearth still with a foot. Brace the hand holding the bearing block against your lower leg so the spindle remains upright.
- Move the bow back and forth in a level path. Begin slowly enough to check that the cord grips and the spindle stays seated.
- Increase the stroke speed and downward pressure as fine dust gathers in the notch. Keep the bow clear of the hearth and bearing block.
- Once the dust sustains an ember, stop and remove the moving parts carefully. Transfer it using the same tinder procedure above.
The bow-drill process ends with the same small ember as a hand drill. If the cord slips, address tension and grip before another attempt. If the bearing block binds, correct its fit; heat and resistance at the upper contact waste effort that belongs at the hearth.
If you have a lens and strong sunlight
A genuine converging lens, such as a magnifying glass, can concentrate direct sunlight onto fine tinder. Place the tinder at the prepared site and move the lens toward or away from it until the light forms the smallest, brightest spot. Hold that spot steady on one area until it chars and sustains an ember, then use the tinder-transfer sequence.
This is a daylight option with the right object, not an alternative available simply because you own glasses or a transparent bottle. If you cannot form a sharp bright focus, that object and the current light are not giving you a workable setup. Cloud, shade and sunset can remove the opportunity completely.
When rain or damp wood changes the attempt
First separate a wet exterior from wood that is damp throughout. Inspect sheltered dead twigs and naturally broken wood within easy reach, rather than assuming every piece on the forest floor is equally usable. Fine material that has remained protected may be more valuable than a much larger exposed branch.
With a suitable tool and the skill to use it, opening dead wood can expose a drier interior for kindling. Without one, work with accessible dry fibers, naturally split pieces and small dead twigs; a log you cannot open is not an available supply of dry shavings. This distinction follows the practical problem of finding and protecting dry fuel in damp conditions.
Protect the unlit nest and drill parts from fresh rain while you work. A dry bag helps when you have one; without a bag, keep a small collection on dry bark in a sheltered position and transfer it only when ready. Do not put the spindle back onto wet ground between attempts.
Continuous rain may leave you without the required dry material. In a humid forest, use the jungle waiting and movement plan to decide what needs doing next; prolonged drilling should not consume the remaining daylight needed to establish a workable place to wait.
Diagnose the failed stage before trying again
Do not change every part at once. Identify whether you failed to make dust, sustain an ember, ignite tinder or establish kindling. Each calls for a different correction. The distinction between dust production, pressure and an ember is central to practitioners' friction-fire troubleshooting.
Use the observed result to choose the next adjustment.
| What happened | What to inspect | Next useful action |
|---|---|---|
| The spindle keeps leaving its socket | Hearth movement, spindle straightness and seating | Stabilize the base or correct the fit before increasing effort |
| The spindle turns but produces little dust | Contact surfaces, pressure and wood pairing | Check that it is wearing wood; reconsider the pair if it merely polishes the socket |
| Dust remains above the hearth | The notch is blocked or too narrow | Open the dust path and reposition the catcher |
| Smoke stops as soon as drilling stops | No self-sustaining ember formed | Check dryness, dust accumulation and sustained pressure; smoke alone is not completion |
| The ember dies in the nest | Tinder fineness, dryness, contact and airflow | Rework or replace the nest before spending effort on another ember |
| Tinder flames, but the twigs do not catch | Kindling size, spacing and moisture | Begin with finer dry twigs and add larger fuel only after they burn |
Stop repeating an attempt when nothing material has changed. Set the parts down, identify a specific adjustment and decide whether you have the resources to make it. If the only proposed change is “try much harder,” compare that effort with what still needs doing before dark.
If fire is not happening, make a workable waiting position
Put unfinished fire-making materials together and switch tasks deliberately. With no equipment, use nearby terrain to reduce wind exposure, choose the driest available place to sit and check for overhead branches and water running through the spot. Close the clothing you have, including a hood if present, rather than sacrificing it for tinder.
Stay connected to the trail or location where you stopped. Make yourself noticeable with visible movements when people are within sight and, where practical, an obvious arrangement of stones in an open nearby spot. Keep a group together. If a phone, whistle, light or shelter is actually available, use it; the plan does not assume those items exist.
These actions apply the outdoor emergency plan's priorities of shelter, visibility and conserving effort. A successful ember can be a later task if conditions improve. Your immediate result is a better place to wait, with less unnecessary movement and a clearer way for someone to find you.
Keep control of the fire, then extinguish it completely
Feed only enough wood for the task and keep spare fuel away from sparks. Attend the fire continuously. If wind begins carrying embers toward surrounding vegetation, extinguish it instead of trying to make a larger fire withstand the weather. Follow the rules for keeping a campfire small and supervised.
Before leaving or sleeping, stop adding fuel, wet the remaining fire thoroughly, stir through the ashes and embers with a suitable stick or tool, and wet them again. Check the entire bed for remaining heat, including beneath apparently dead ash. Keep working until the remains are extinguished and cold, following the drown, stir and recheck process. A shallow covering of dirt can conceal live heat; it is not a completion check.
If you already have a fire and unexpectedly lose access to water, the NPS describes spreading the coals and repeatedly mixing in mineral soil or sand until extinguished. Simply burying them can retain heat. Remain with the site until it is cold; this fallback does not replace arranging extinguishing supplies before ignition.
Zombie Scenario: The Ember Arrives Before the Kindling
Fictional scenario
Two travelers stop at an established fire site beyond an abandoned town. They have dry wood, a cord and water for extinguishing, but their matches were lost earlier in the week. One works the bow drill while the other opens a packet of food. The first ember forms beside an unfinished tinder nest and a pile of thick branches.
They let that attempt end and change the work order. One prepares the fine fibers and sorts the twigs while the other corrects the cord tension. On the next attempt, the ember has somewhere to go immediately. They keep the resulting fire small and leave time to extinguish it before moving. The improvement came from completing the chain of tasks, not from making the drill spin faster.
Frequently Asked
How long should it take to make fire by friction?
Does the spindle always need to be harder than the hearth?
Can two people help make a friction fire?
Is a fire plough a real alternative to a hand drill?
What should I practice before relying on this outdoors?
Can I use the fire to make collected water drinkable?
Sources
- National Park Service — Campfires
- Smokey Bear — Campfire Safety
- National Park Service — Wildland Fire Spread and Suppression
- The Scout Association — Prepare to Flare
- Storm, Primitive Ways — A Friction Fire Inquiry: Hand Drill
- Ken Youngquist, Primitive Ways — Hearthboard Variations
- National Park Service — Forces & Tools
- Primitive Ways — Fire-Making Questions Answered by Practitioners
- Firecrafter — Fire by Friction
- The Scout Association — Burning Ambitions: Making Fire Using a Bow Drill
- Missouri Department of Conservation — How to Start a Fire Without Matches
- Paul Kirtley — Tactics for Fire-Lighting in the Damp, Cold Months
- National Park Service — Outdoor Emergency Plan
- Museum of New Zealand Te Papa Tongarewa — Hika Ahi: Making Fire
Related guides
What to Do If You Get Lost in the Woods
A practical plan for losing your way in a forest: recover a known route when you can, and make yourself easier to find when you cannot.

Lost in the Jungle: Finding Your Way Back and Getting Help
What to do when a rainforest trail disappears, your group moves out of sight, or heavy rain cuts off the way back—with or without equipment.
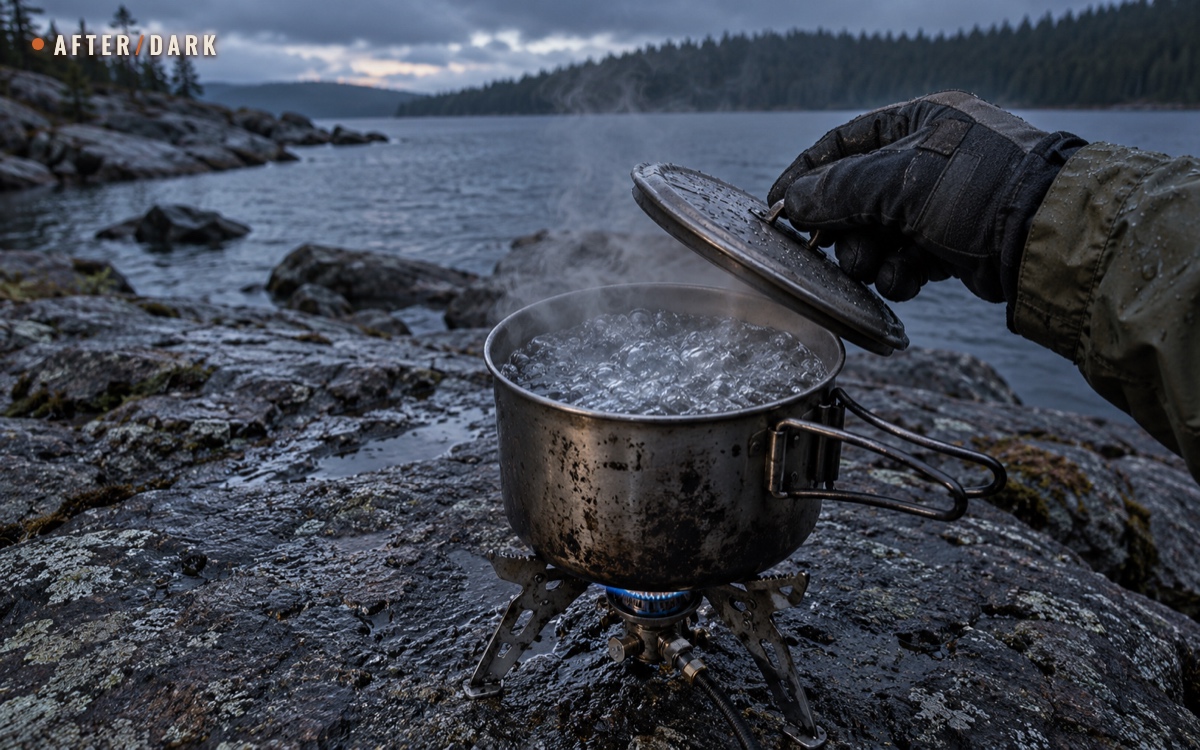
How to Make Water Safe to Drink in the Wild
Use a pot and heat, a filter and disinfectant, or sunlight to turn collected fresh water into a drinking supply. Follow the steps for what you have.